Dehydrating Garden Vegetables for Easy Storage: A Step-by-Step Guide

Preserve your harvest for long-term storage with this simple guide to dehydrating garden vegetables…
Key Takeaways:
- Dehydrating vegetables helps in long-term storage, preserving their nutrients and flavors.
- A food dehydrator is the most efficient tool, but alternatives like ovens can also be used.
- Blanching vegetables before dehydrating is essential for most but not all vegetables.
- Properly dehydrated vegetables should be crisp and break easily.
- Store dehydrated vegetables in airtight containers in a cool, dark place for maximum shelf life.
Why Dehydrate Garden Vegetables?
Dehydrating garden vegetables is an excellent way to preserve your garden’s bounty for months to come. It removes moisture, which inhibits the growth of bacteria and mold, making your produce last longer. Most importantly, it allows you to enjoy the flavors of summer even in the dead of winter!
- Long-term storage without refrigeration
- Reduced food waste
- Easy to rehydrate and use in recipes
- Compact storage
Benefits of Dehydration for Storage
Dehydrating garden vegetables provides several benefits, particularly when it comes to storage. Dried vegetables take up significantly less space than their fresh counterparts. A pound of fresh tomatoes can be reduced to just a few ounces when dehydrated, making them easier to store in a pantry or cupboard.

Image from www.eatingwell.com.
Besides that, dehydrated vegetables are lightweight, making them perfect for camping trips or emergency food supplies. They retain most of their nutrients and can be easily rehydrated by soaking in water or adding directly to soups and stews.
Cost Efficiency of Dehydrating Garden Vegetables
Dehydrating vegetables can save you money in the long run. Fresh vegetables can be bought in bulk during peak seasons when they are cheaper and more abundant. By dehydrating them, you can extend their shelf life and reduce the need to buy expensive, out-of-season produce. And if you have excess veggies from your garden during the summer months, you can feed your family year-round by preserving some for later use!
Moreover, dehydrated vegetables require no refrigeration or freezing, which saves on energy costs. This makes dehydration a cost-effective method of food preservation.
Retaining Nutrients Through Dehydration
One of the main concerns when preserving food is nutrient retention. Dehydrating garden vegetables at low temperatures helps to preserve their vitamins and minerals. Unlike canning, which can destroy some nutrients due to high heat, dehydration retains most of the nutritional value of the vegetables.
For example, dehydrated carrots retain their beta-carotene, and dried tomatoes keep much of their lycopene content. This means you can enjoy the health benefits of your garden produce all year round. Learn more about tomato preservation techniques to make the most out of your harvest.
Essential Equipment for Dehydrating Garden Vegetables
To get started with dehydrating garden vegetables, you’ll need some basic equipment. The most important tool is a food dehydrator, but there are other essential items that can also make the process smoother and more efficient.
Choosing the Right Dehydrator
When it comes to choosing a dehydrator, there are several factors to consider. Look for a model with adjustable temperature settings, as different vegetables require different drying temperatures. A dehydrator with a fan will ensure even drying and reduce the risk of mold. A number of budget-friendly options are available, as well as higher-end models with more features.
Here are some popular dehydrator models at varying price ranges:
| Model | Features | Price Range |
|---|---|---|
| Excalibur 3926TB | Adjustable thermostat, 9 trays, 26-hour timer | $200-$250 |
| Nesco FD-75A | Adjustable thermostat, 5 trays, top-mounted fan | $60-$80 |
| Presto 06300 | 4 trays, expandable, bottom-mounted fan | $40-$60 |
Necessary Tools and Accessories
In addition to a dehydrator, you’ll need a few other tools to make the dehydration process easier.
- Sharp knife or mandoline: For slicing vegetables evenly.
- Blanching pot: To blanch vegetables before dehydrating.
- Cooling racks: For cooling blanched vegetables before placing them in the dehydrator.
- Airtight containers: For storing dehydrated vegetables.
Budget-Friendly Alternatives to Dehydrators
If you don’t want to invest in a dehydrator right away, there are more budget-friendly alternatives. An oven can be used to dehydrate vegetables, although it may not be as efficient. Set your oven to its lowest temperature, usually around 140°F, and place the vegetables on a baking sheet. Keep the oven door slightly ajar to allow moisture to escape. This will take several hours, up to a full day, depending on the size and type of produce you are drying.
Another option is air drying, which works well for herbs and some vegetables. Hang them in a well-ventilated, dry area until they are completely dried. However, this method can take several days and is not suitable for all types of vegetables.
Preparing Vegetables for Dehydration
Proper preparation is key to successful dehydration. The way you prepare your vegetables will affect their drying time and quality. Follow these steps to get your vegetables ready for dehydration.
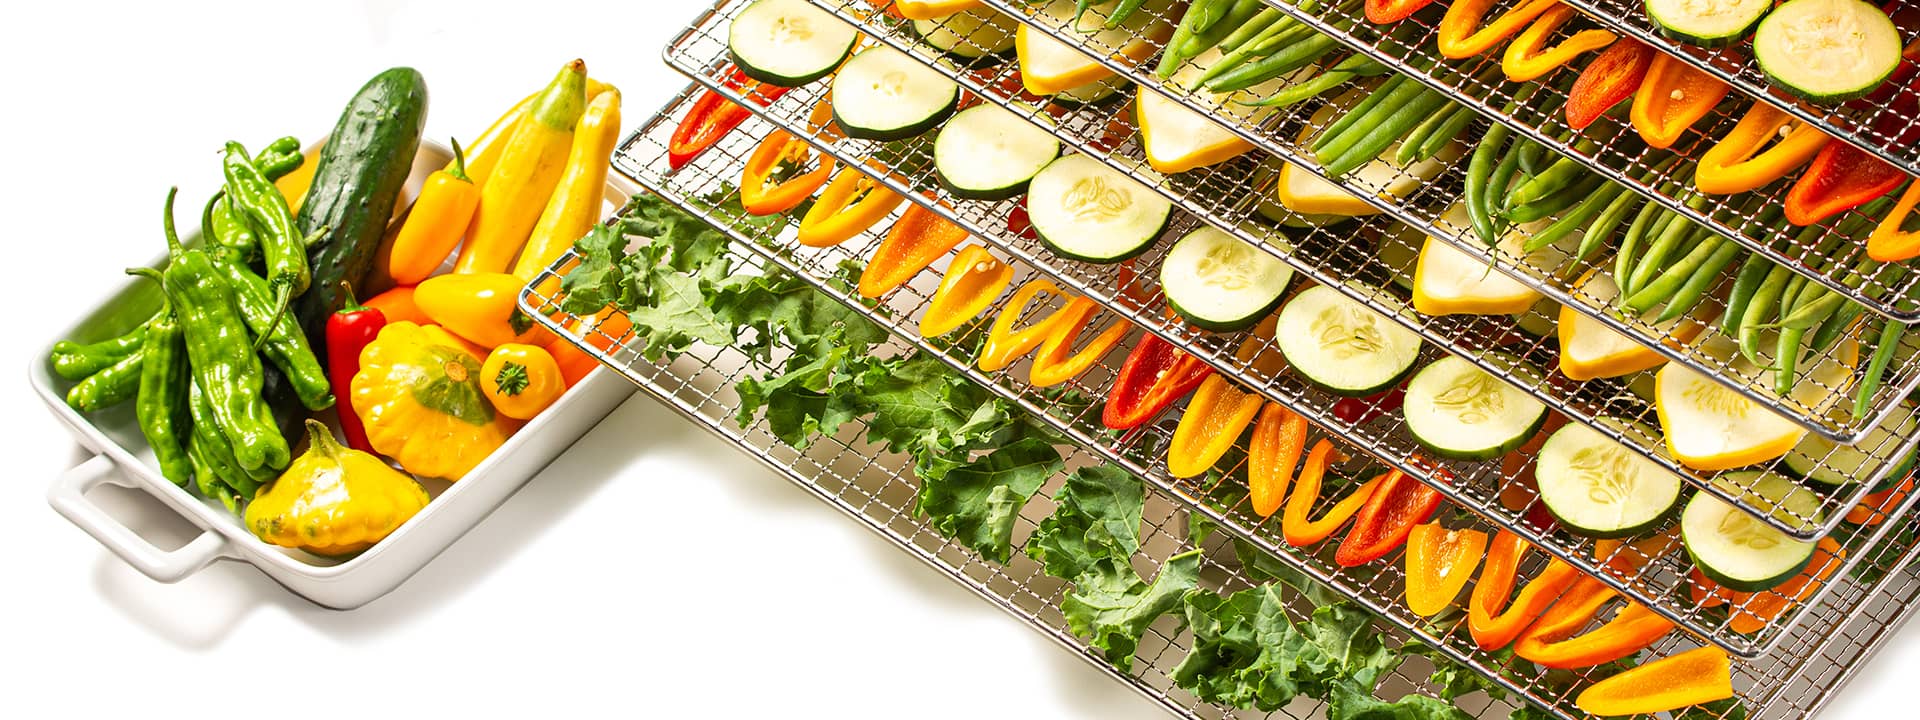
Image from brodandtaylor.com.
Washing and Peeling Vegetables
Start by washing your vegetables thoroughly to remove any dirt or pesticides. You can use a vegetable brush to scrub them clean. Depending on the type of vegetable, you may also need to peel them. For example, carrots and potatoes should be peeled, while vegetables like zucchini and peppers can be dehydrated with their skins on. For more tips on preservation, check out this guide to preservation methods.
Uniformly Cutting Vegetables
Cutting vegetables into uniform pieces ensures that they dry evenly. Use a sharp knife or a mandoline to slice them into thin, even pieces. The thickness of the slices will depend on the type of vegetable. Generally, slices should be about 1/4 inch thick.
For example, tomatoes can be sliced into 1/4 inch rounds, while green beans can be cut into 1-inch pieces. Uniformity is key to preventing some pieces from drying faster than others.
Blanching Vegetables: Which Ones and How
Blanching is an essential step for many vegetables as it helps preserve their color, flavor, and texture. Not all vegetables need to be blanched, but those that do will benefit greatly from this step. Vegetables like carrots, broccoli, and green beans should be blanched before dehydrating.
To blanch vegetables, follow these steps:
- Bring a pot of water to a boil.
- Submerge the vegetables in the boiling water for 2-3 minutes.
- Remove the vegetables and immediately plunge them into an ice bath to stop the cooking process.
- Drain and pat the vegetables dry before placing them in the dehydrator.
Avoiding Common Preparation Mistakes
There are a few common mistakes to avoid when preparing vegetables for dehydration. First, don’t skip the blanching step for vegetables that require it. This can result in poor texture and color. Second, make sure to cut the vegetables into uniform pieces to ensure even drying. Lastly, don’t overcrowd the dehydrator trays. Air needs to circulate around the vegetables for them to dry properly.
Avoiding Common Preparation Mistakes
Even seasoned homesteaders can make mistakes when preparing vegetables for dehydration. Here are some common pitfalls and how to avoid them:
“Skipping the blanching step can result in vegetables with poor texture and color. Always blanch vegetables that require it.”
Another common mistake is cutting vegetables into uneven pieces. This can cause some pieces to dry faster than others, leading to inconsistent results. Always aim for uniform slices or pieces to ensure even drying.
Lastly, avoid overcrowding the dehydrator trays. Proper air circulation is key to effective dehydration. If the trays are too full, the vegetables won’t dry evenly, and you might end up with moldy or improperly dehydrated produce.
Step-by-Step Dehydrating Process
Now that your vegetables are prepped, it’s time to start the dehydrating process. Follow these steps to ensure your vegetables are dried perfectly every time.
Setting Up the Dehydrator
Begin by setting up your dehydrator in a well-ventilated area. Make sure it is on a stable surface and away from any flammable materials. Plug it in and set the temperature according to the type of vegetable you are dehydrating.
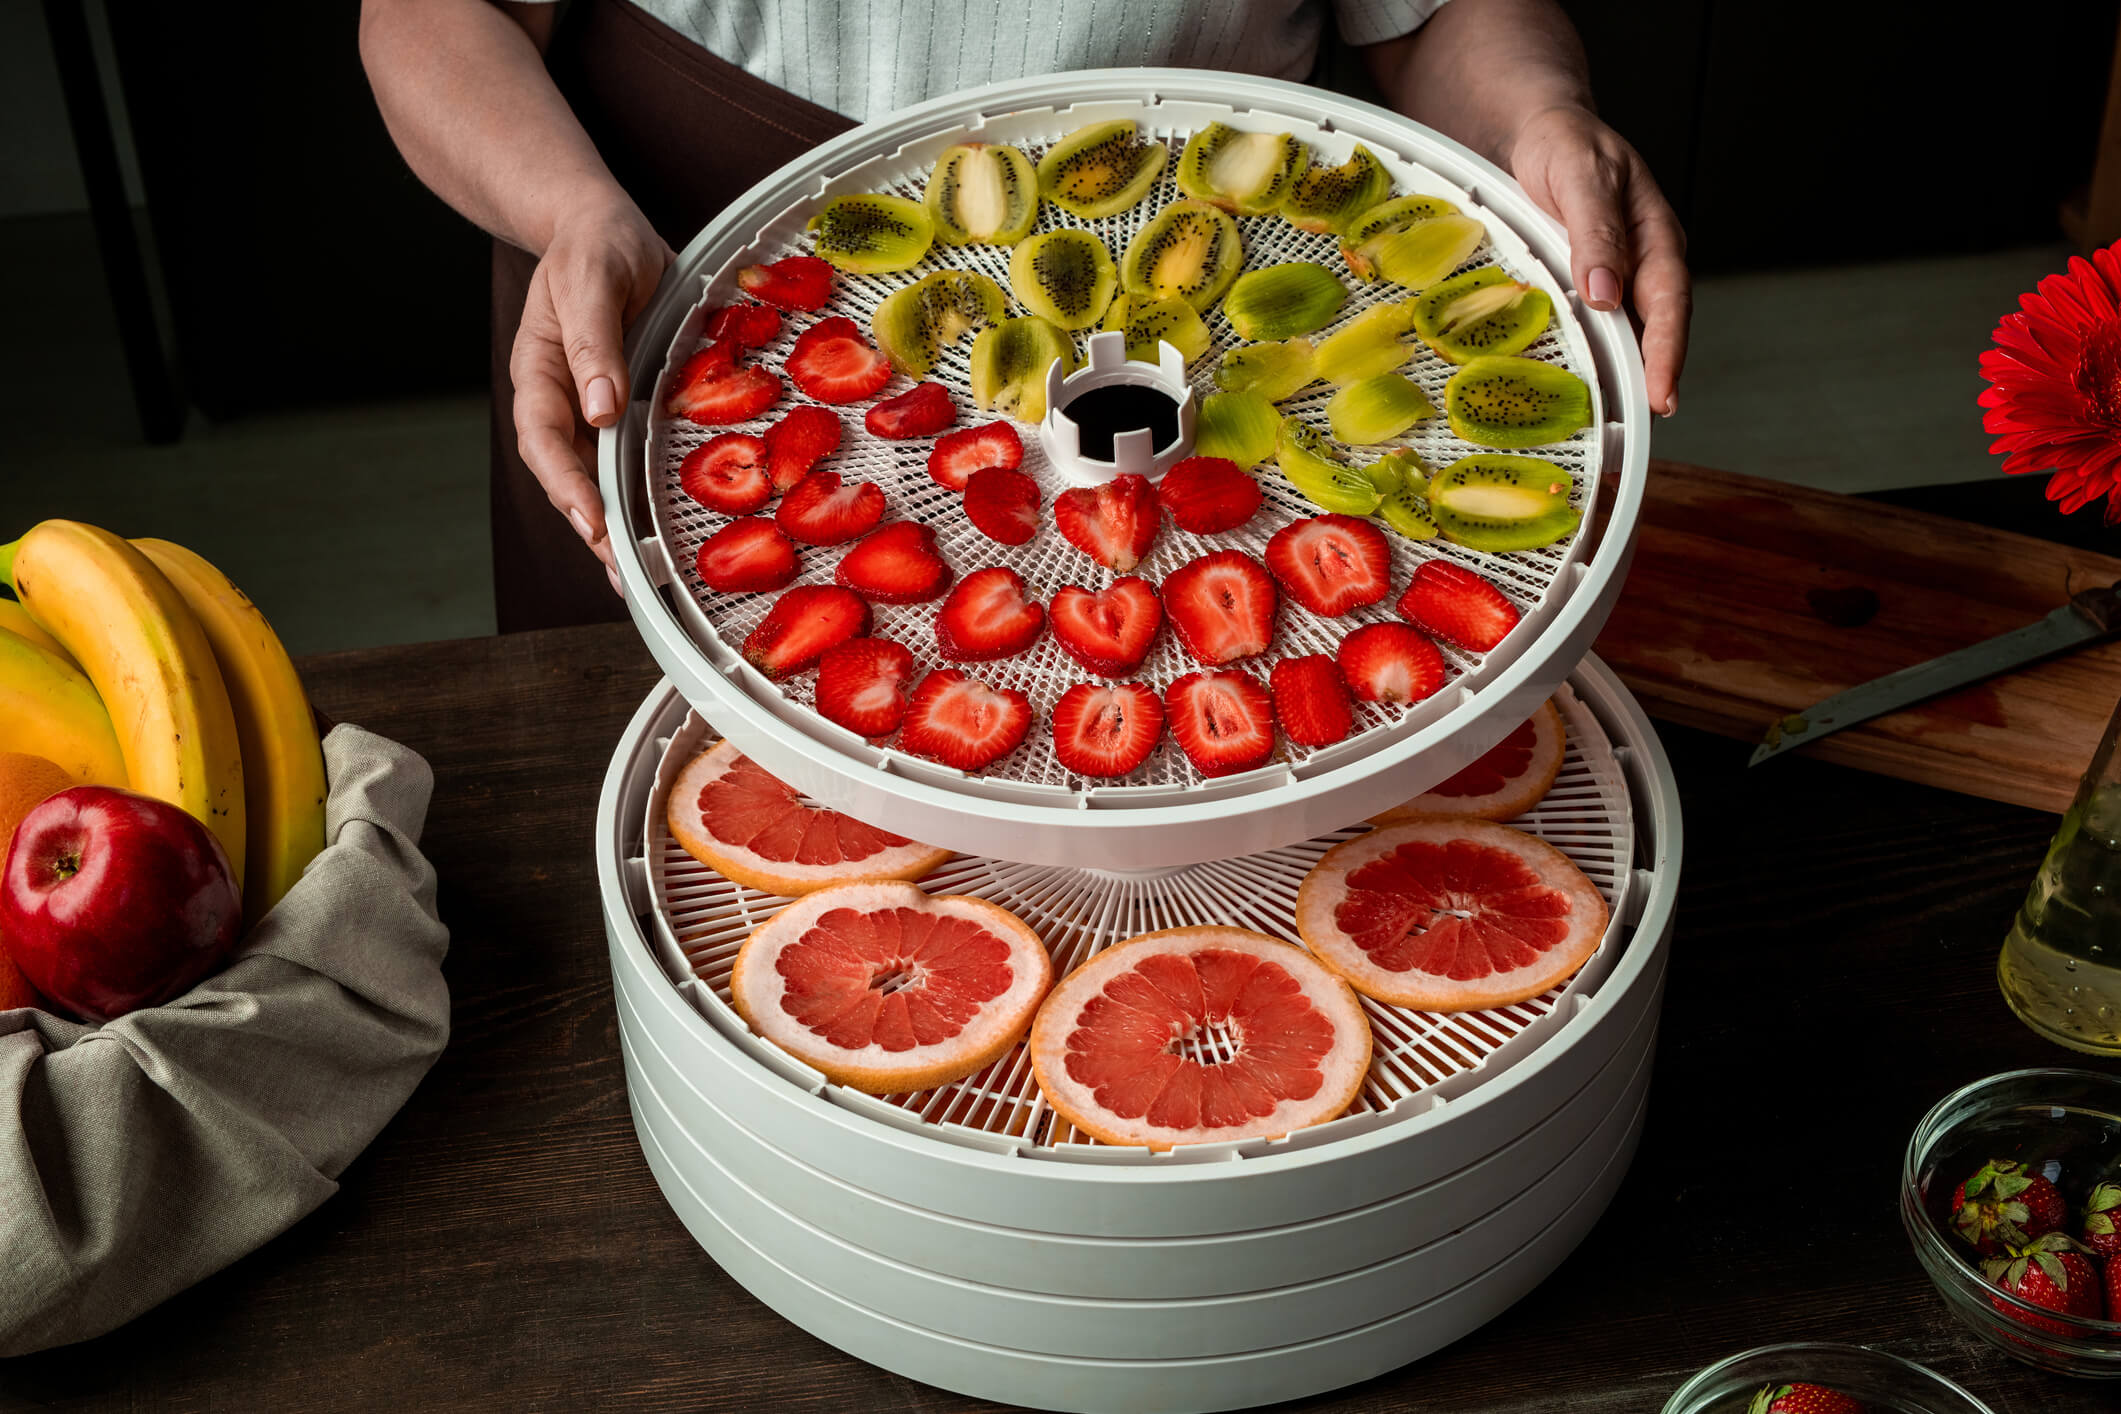
Image from foodrevolution.org.
Most dehydrators come with a temperature guide, but here are some general guidelines:
| Vegetable | Temperature | Drying Time |
|---|---|---|
| Carrots | 125°F | 6-10 hours |
| Broccoli | 135°F | 8-14 hours |
| Green Beans | 135°F | 8-12 hours |
Loading the Trays Correctly
Once the dehydrator is set up and preheated, it’s time to load the trays. Arrange the vegetables in a single layer on each tray, making sure they do not overlap. This ensures that air can circulate around each piece, allowing for even drying.
If you’re dehydrating different types of vegetables at the same time, place those with similar drying times on the same tray. This will make it easier to monitor their progress and remove them when they are done.
Temperature and Timing Guide for Different Vegetables
Different vegetables require different temperatures and drying times. Here is a quick guide to help you get started.
- Tomatoes: 135°F, 8-10 hours
- Zucchini: 125°F, 6-8 hours
- Bell Peppers: 125°F, 8-12 hours
- Onions: 135°F, 6-10 hours
Always check the manufacturer’s guidelines for your specific dehydrator, as drying times can vary based on the model and the thickness of the vegetable slices.
Monitoring the Dehydration Process
During the dehydration process, it’s essential to monitor the progress regularly. Check the vegetables every few hours to ensure they are drying evenly. Rotate the trays if your dehydrator does not have a fan to ensure even air circulation.
If you notice any pieces drying faster than others, remove them to prevent over-drying. It’s better to err on the side of caution and check more frequently than to end up with overly dry or burnt vegetables.
Signs That Vegetables Are Properly Dehydrated
Knowing when your vegetables are properly dehydrated is crucial. Properly dried vegetables should be crisp and break easily. Here are some specific signs to look for:
- Carrots: Brittle and snap easily.
- Tomatoes: Leathery but not sticky.
- Green Beans: Brittle and break easily.
If you’re unsure, take a piece and let it cool completely. If it feels sticky or soft, it needs more drying time. Properly dried vegetables should not feel moist or soft.
Storing Dehydrated Vegetables
Once your vegetables are properly dehydrated, the next step is to store them correctly to maximize their shelf life. Proper storage is key to maintaining the quality and flavor of your dehydrated produce.
Best Containers for Storage
Airtight containers are the best option for storing dehydrated garden vegetables. Mason jars with tight-fitting lids, vacuum-sealed bags, or Mylar bags with oxygen absorbers are all excellent choices. These containers will keep out moisture and air, which can degrade the quality of the vegetables over time.
Ideal Storage Conditions
Store your dehydrated vegetables in a cool, dark place. A pantry or cupboard away from direct sunlight is ideal. Heat and light can cause the vegetables to lose their color and flavor, so it’s important to keep them in a dark, temperature-controlled environment.

Image from brodandtaylor.com.
How Long Do Dehydrated Vegetables Last?
When stored properly, dehydrated vegetables can last for several months to a year or more. The exact shelf life will depend on the type of vegetable and how well it was dried and stored. Regularly check your stored vegetables for any signs of moisture or mold, and use them promptly or discard them if you notice any issues.
Troubleshooting Storage Problems
If you notice any issues with your stored dehydrated vegetables, such as moisture or mold, it’s important to address them immediately. Here are some common storage problems and how to troubleshoot them:
- Moisture: If you find moisture in your storage containers, remove the affected vegetables and re-dry them. Ensure the containers are completely dry before resealing.
- Mold: Mold indicates that the vegetables were not dried thoroughly. Discard any moldy vegetables and check the remaining batch for signs of moisture.
- Loss of flavor: If your vegetables have lost their flavor, it could be due to exposure to light or heat. Ensure they are stored in a cool, dark place to maintain their quality.
Additional Tips for Successful Dehydrating
Dehydrating garden vegetables can be a straightforward process, but a few extra tips can ensure you get the best results every time. Paying attention to these details can make a significant difference in the quality of your dehydrated produce.
Best Practices for Consistent Results
To achieve consistent results, follow these best practices:
- Use fresh produce: The fresher the vegetables, the better they will dehydrate. Avoid using overripe or damaged produce.
- Maintain uniformity: Cut vegetables into uniform pieces to ensure even drying.
- Monitor humidity: Dehydration works best in a low-humidity environment. If you live in a humid area, consider using a dehumidifier in the room where you dehydrate.
- Rotate trays: If your dehydrator does not have a fan, rotate the trays periodically to ensure even drying.
Innovative Uses for Dehydrated Vegetables
Dehydrated vegetables are versatile and can be used in various ways. Here are some ways to enjoy them:

Image from www.ohnuts.com.
For example, you can incorporate them into soups, stews, and casseroles for added nutrition and flavor. They also make great snacks and can be rehydrated for use in recipes.
- Soups and stews: Add dehydrated vegetables directly to soups and stews for a burst of flavor and nutrition.
- Trail mix: Combine dehydrated vegetables with nuts and seeds for a healthy, portable snack.
- Powders: Grind dehydrated vegetables into powders to use as seasonings or to add nutrients to smoothies and sauces.
- Snacks: Enjoy dehydrated vegetables as a crunchy, healthy snack. Season them with your favorite spices for extra flavor!
Maintaining Dehydrator for Longevity
Proper maintenance of your dehydrator will ensure it lasts for many years. Follow these tips to keep your dehydrator in top condition:
- Clean regularly: After each use, clean the trays and the interior of the dehydrator to prevent buildup of food particles and bacteria.
- Check the fan and motor: Periodically check the fan and motor for any signs of wear or damage. Clean the fan blades to ensure efficient airflow.
- Store properly: When not in use, store your dehydrator in a cool, dry place to prevent damage from moisture and dust.
- Follow manufacturer’s instructions: Always refer to the user manual for specific maintenance tips and guidelines for your model.
Frequently Asked Questions
Do I Need to Blanch All Vegetables Before Dehydrating?
No, not all vegetables need to be blanched before dehydrating. Vegetables like onions, celery, mushrooms, most greens, zucchini, and peppers do not require blanching. However, some firm vegetables like carrots, broccoli, and green beans should be blanched to preserve their color, texture, and flavor.
How Do I Know When Vegetables Are Fully Dehydrated?
Properly dehydrated vegetables should be firm or crisp. For example, dried carrots should be brittle and snap easily, while tomatoes should be leathery but not sticky. If you’re unsure, let a piece cool completely. If it feels soft or sticky, it needs more drying time.
Can I Dehydrate Frozen or Canned Vegetables?
Yes, you can dehydrate some types of frozen or canned vegetables. For frozen vegetables, you will need thaw them completely, drain off any liquid and pat them dry before placing them in the dehydrator. For canned vegetables, drain and rinse them thoroughly to remove any excess salt or preservatives. Keep in mind that the texture and flavor may differ slightly from fresh vegetables. For those interested in other preservation methods, you might find this comparison of canning vs freezing helpful.
Featured image from mygardenlife.com.


Related Posts
-
 Keeping Carrots Crisp: Post-Harvest Techniques for Long-Lasting Freshness
- Making Zesty Homemade Sauerkraut: A Guide to Fermenting Cabbage
- Tomato Preservation Guide: Best Canning, Freezing & Drying Techniques
- Best Spinach Preservation Methods: Canning vs Freezing Comparison
- How to Harvest & Dry Garden Herbs
- [Infographic] Best Food Preservation Methods for the Home Gardener


