DIY Root Cellars: How to Build Your Own Vegetable Storage Area

DIY root cellars are a simple and sustainable way to store your root vegetables and other storage crops. Here are the basic steps for building your own root cellar…
Key Takeaways:
- Building a root cellar can significantly extend the shelf life of fruits and vegetables by maintaining a consistent cool and humid environment.
- Choosing the right location is crucial; consider factors like soil type, drainage, and proximity to your home.
- Root cellars can be built indoors or outdoors, with various designs like barrel, basement, or hill-integrated options.
- Proper ventilation is essential to prevent mold and spoilage, while maintaining optimal temperature and humidity levels.
- Effective storage practices involve organizing produce according to their specific needs to ensure longevity and freshness.
DIY Root Cellars: How to Build Your Own Vegetable Storage Area
Have you ever thought about how our ancestors stored food without the convenience of modern refrigeration? The answer lies in the age-old practice of using root cellars. These simple yet effective storage solutions harness the earth’s natural properties to keep food fresh for extended periods. Today, we’ll explore how you can build your own root cellar, making it an integral part of your homesteading journey!

Image from www.instructables.com.
Benefits of Building a Root Cellar
Why invest time and effort into building a root cellar? The benefits are numerous and rewarding. Most importantly, a root cellar allows you to store large quantities of produce without relying on electricity, which can be especially useful during power outages or in off-grid living situations. Additionally, it promotes self-sufficiency and reduces food waste.
Preserving Freshness and Reducing Waste
DIY root cellars are designed to maintain a consistent temperature and humidity level, ideal for preserving fruits and vegetables. This environment slows down the ripening process and prevents spoilage. For instance, apples stored in a root cellar can last several months longer than if they were kept on a kitchen counter.
Utilizing Natural Temperature Control
One of the greatest advantages of a root cellar is its ability to utilize the earth’s natural insulation. By building underground or against a hillside, the cellar can maintain temperatures between 32°F and 40°F, perfect for storing a variety of produce. This natural temperature control means you won’t need to rely on energy-consuming appliances.
Reducing Energy Consumption
Because DIY root cellars do not require electricity to function, they offer a sustainable and eco-friendly storage solution. By reducing reliance on refrigerators and freezers, you’ll save on energy costs and reduce your carbon footprint! This makes a root cellar an excellent choice for those committed to sustainable living.
Getting Started: Planning Your Root Cellar
Before you start digging, it’s crucial to plan your root cellar carefully. A well-thought-out plan will ensure your root cellar is effective and meets your storage needs. Consider factors such as location, design, and size to ensure success.

Image from www.familysurvivalplanning.com.
Choosing the Right Location
The location of your root cellar is paramount. Ideally, it should be easily accessible from your home, especially in winter. Look for a spot with good drainage to prevent water from seeping in. A north-facing slope is often ideal, as it naturally stays cooler and receives less direct sunlight.
Deciding Between Indoor and Outdoor Options
Next, decide whether you want an indoor or outdoor root cellar. Each has its pros and cons:
- Indoor DIY root cellars: Often located in basements, these are convenient and protected from the elements. However, they may require additional insulation and ventilation systems.
- Outdoor DIY root cellars: These can be built into hillsides or dug into the ground. They take advantage of natural insulation but may be more challenging to access in inclement weather.
Understanding Soil and Drainage Requirements
Soil type and drainage are critical to the success of your root cellar. Sandy soil with good drainage is ideal, as it prevents water from accumulating. If your soil is heavy clay, consider adding gravel or installing drainage pipes to direct water away from your cellar.
Calculating the Ideal Size for Your Needs
Consider the amount of produce you plan to store and the available space on your property. A small root cellar can be as simple as a buried barrel, while a larger one might be a full walk-in structure. Plan for shelves and bins to keep your produce organized and easily accessible.
Types of Root Cellars You Can Build
There are several types of root cellars to consider, each with its unique benefits. Your choice will depend on your specific needs, budget, and available space.
Outdoor Root Cellar Designs
Outdoor root cellars are popular for their natural insulation and traditional feel. They can be built into hillsides or as standalone structures. One common design is the “earth berm,” where the cellar is covered with a layer of earth for added insulation.

Image from kowalskimountain.com.
“The earth berm design is an excellent option for those living in colder climates, as the added earth layer helps maintain a stable temperature year-round.”
Indoor Basement Root Cellars
For those with existing basements, converting a portion into a root cellar can be a practical solution. This option offers convenience and protection from the elements. When designing an indoor root cellar, consider these factors:
- Ensure proper ventilation to prevent mold and maintain air circulation.
- Use insulated walls and doors to maintain consistent temperatures.
- Install humidity controls if necessary to protect sensitive produce.
Barrel Root Cellar for Limited Space
If you’re tight on space or looking for a quick and straightforward solution, consider a barrel root cellar. This method is not only space-efficient but also relatively easy to construct. It involves burying a large barrel, typically made of metal or plastic, into the ground. It’s a fantastic option for those with smaller gardens or limited resources.
To create a barrel root cellar, start by selecting a suitable location with well-drained soil. Choose a suitable barrel, ensuring it’s clean and food-safe. Dig a hole deep enough to accommodate the barrel while allowing a portion to remain above ground for easy access. Consider lining it with straw or sawdust for added insulation. Cover the top with a wooden lid or hatch to protect it from rain and debris. Remember to drill a few holes in the bottom and sides for ventilation, allowing air to circulate and prevent mold growth.
To prevent water from contacting your stored vegetables during wet periods, you may wish to fill the bottom of the barrel with coarse gravel covered by a layer of sand. This will allow any excess moisture to drain away from your produce.
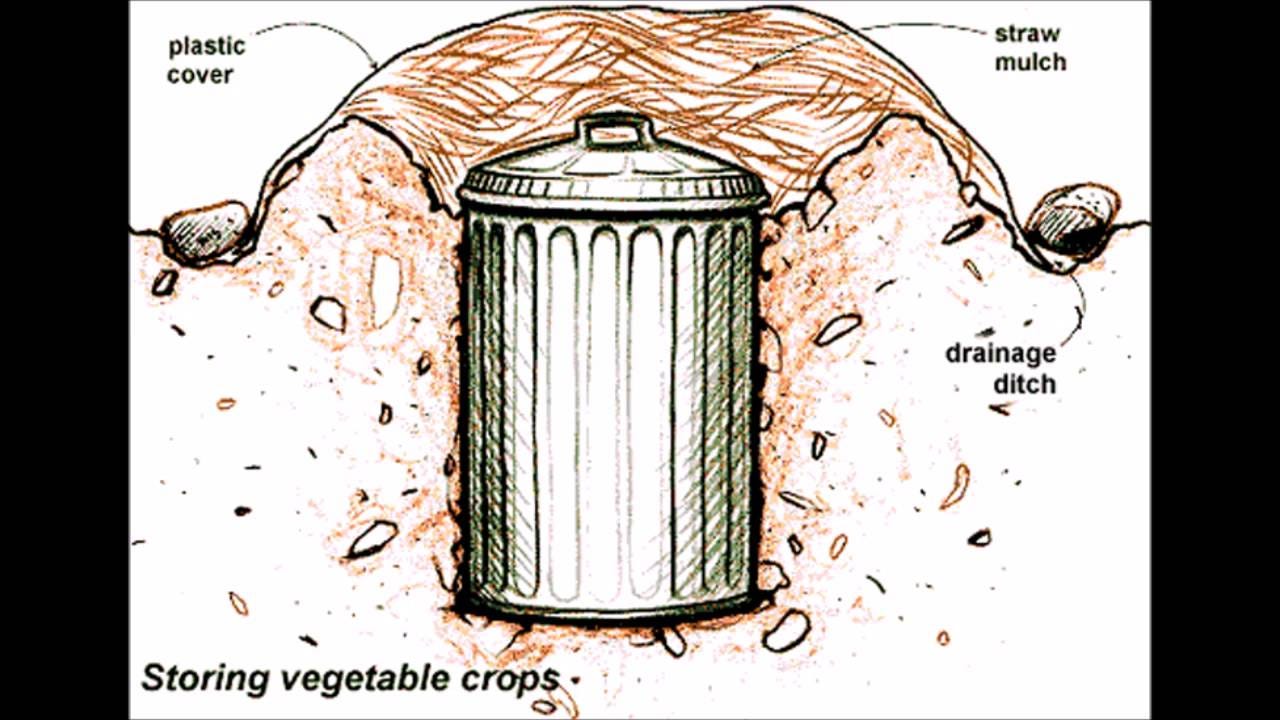
Image from medium.com.
Under-Structure and Hill-Integrated Designs
For those with more space and resources, under-structure or hill-integrated designs offer excellent insulation and storage capacity. These designs utilize the natural landscape to create a stable environment for storing produce.
An under-structure root cellar can be built beneath an existing building, such as a barn or shed. This design takes advantage of the building’s insulation and provides convenient access. On the other hand, a hill-integrated root cellar involves excavating into a hillside, using the earth’s natural insulation to maintain a consistent temperature.
Construction Steps for Your Root Cellar
Building a DIY root cellar involves several key steps, each crucial to the cellar’s effectiveness and longevity. Follow these steps to ensure a successful project:
Gathering Essential Materials and Tools
Before breaking ground, gather all necessary materials and tools. You will need concrete blocks or treated wood for the structure, insulation materials, and ventilation pipes. Tools such as shovels, a level, a saw, and a drill will also be essential. Having everything ready before starting will streamline the construction process and prevent unnecessary delays.
Excavation and Foundation Building
The first major step in constructing your root cellar is excavation. Dig out the area where your cellar will be located, ensuring the space is large enough for your planned design. Pay attention to soil drainage and stability. Once excavated, lay a foundation using gravel or concrete to provide a stable base for your structure. This foundation will help prevent water infiltration and maintain the cellar’s structural integrity.
Framing and Insulating Your Structure
With the foundation in place, it’s time to frame your root cellar. Use sturdy materials like treated wood or concrete blocks to build the walls and roof. Once framed, add insulation to maintain a consistent internal temperature. Common insulation materials include straw bales, foam boards, or even natural earth. The goal is to keep the cellar cool in summer and above freezing in winter.
Installing Shelving and Bins for Storage
After constructing the basic structure, focus on organizing the interior. Install shelves and bins to maximize storage space and keep produce organized. Use materials that resist moisture and rot, like treated wood or metal. Consider adjustable shelving to accommodate different types of produce and ensure easy access to stored items.
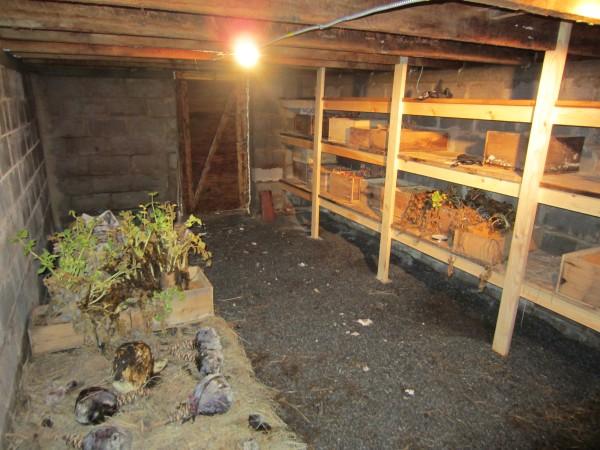
Image from www.offthegridnews.com.
Ventilation and Temperature Management
Proper ventilation and temperature management are critical to the success of your root cellar. Without these, your produce may spoil quickly due to mold growth or temperature fluctuations.
Ventilation allows for the exchange of air, preventing the buildup of ethylene gas produced by ripening fruits and vegetables. It also helps control humidity levels, which can otherwise lead to mold or rot.
Why Proper Ventilation Matters
“Ventilation is crucial for preventing mold and spoilage in a root cellar. Without it, the air can become stagnant, causing produce to deteriorate quickly.”
To ensure proper ventilation, install two vents: one near the ceiling for warm air to escape and another near the floor to bring in cooler air. This setup creates a natural airflow that helps regulate temperature and humidity.
Installing Airflow Systems
Installing an effective airflow system involves placing vents strategically to facilitate air movement. Use PVC pipes or similar materials to construct the vents. Ensure they are covered with mesh to prevent pests from entering. If natural airflow is insufficient, consider adding a small fan to enhance air circulation. For more detailed guidance, explore this guide.
Tracking and Adjusting Temperature
Consistently monitor the temperature inside your root cellar using a reliable thermometer. Aim to maintain a range between 32°F and 40°F. If temperatures fluctuate, adjust insulation or ventilation as needed. In some cases, adding additional insulation or adjusting the vent openings can help stabilize temperatures.
Managing Humidity Levels
Humidity is another critical factor in a successful root cellar. Aim for a humidity level of 85-95% to keep produce fresh without encouraging mold growth. If the humidity is too low, consider adding a shallow pan of water to the cellar. Conversely, if it’s too high, increase ventilation or use a dehumidifier to reduce moisture levels.
Effective Food Storage Practices
Once your root cellar is built and optimized, focus on effective storage practices to ensure your produce lasts as long as possible. Organizing and maintaining optimal conditions are key to maximizing the benefits of your root cellar.
Begin by categorizing your produce based on their storage requirements. Some fruits and vegetables prefer cooler temperatures, while others thrive in slightly warmer conditions. Keep these preferences in mind when organizing your cellar to prevent premature spoilage.
Creating a Storage Plan for Different Produce
When it comes to storing produce in your root cellar, having a plan is crucial. Different fruits and vegetables have varying storage needs, and organizing them accordingly will help extend their shelf life. For example, root vegetables like carrots and potatoes thrive in high humidity, while onions and garlic prefer drier conditions.
Begin by separating produce into categories based on their storage requirements. This will allow you to create zones within your root cellar that cater to specific needs. For instance, designate a cool, humid area for root vegetables and a slightly warmer, drier spot for onions, garlic, and winter squashes. By doing so, you can ensure that each type of produce remains fresh for as long as possible.
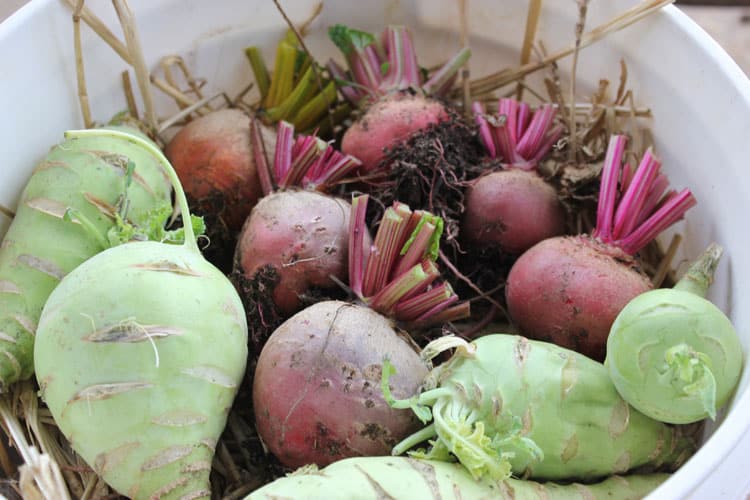
Image from homestead-honey.com.
Maintaining Optimal Conditions for Longevity
Maintaining the right conditions in your root cellar is essential for preserving the quality of your stored produce. Temperature and humidity are two critical factors that need constant monitoring. Use a thermometer and hygrometer to track these conditions and make adjustments as needed.
To maintain optimal humidity, consider using natural materials like sand or sawdust to insulate your produce. These materials can help retain moisture while preventing mold growth. Additionally, ensure that your ventilation system is functioning properly to facilitate airflow and regulate temperature. By keeping these conditions in check, you can maximize the longevity of your stored produce.
Organizing Bins and Shelves
Proper organization within your root cellar is key to making the most of your storage space. Install sturdy shelves and bins to keep your produce organized and easily accessible. Use materials that resist moisture, such as treated wood or metal, to prevent decay.
Label each bin or shelf with the type of produce it contains and the date it was stored. This will help you keep track of your inventory and ensure that older items are used first. Consider using adjustable shelving to accommodate different sizes of produce and maximize your storage capacity.
Avoiding Common Storage Mistakes
Even with careful planning, it’s easy to make mistakes when storing produce in a root cellar. One common mistake is overcrowding, which can lead to poor air circulation and increased spoilage. Be sure to leave space between items to allow for proper airflow.
Another mistake is storing incompatible produce together. Some fruits, like apples, emit ethylene gas, which can speed up the ripening process of nearby vegetables. Keep ethylene-producing fruits separate from sensitive vegetables to prevent premature spoilage. Regularly inspect your stored produce for signs of spoilage and remove any affected items promptly.

Image from miasdailydish.com.
Wrapping Up Your Root Cellar Project
Completing your root cellar project is an exciting milestone, but the journey doesn’t end there. Regular maintenance and adaptation are essential to ensure the longevity and effectiveness of your cellar.
Assessing the Success of Your Build
Once your DIY root cellar is operational, take time to assess its success. Monitor temperature and humidity levels to ensure they remain within the desired range. Evaluate the effectiveness of your ventilation system and make adjustments if necessary.
Pay attention to the condition of your stored produce. If you notice signs of spoilage or mold, investigate the cause and take corrective action. Regular assessments will help you identify areas for improvement and ensure your root cellar remains a reliable storage solution. For tips on storing specific vegetables, check out our root vegetable storage guide here.
Tips for Ongoing Maintenance and Use
Maintaining your root cellar involves regular inspections and upkeep. Keep an eye on the structural integrity of the cellar, checking for signs of leaks or damage. Clean and sanitize shelves and bins periodically to prevent mold growth and pests.
As you use your stored produce, rotate your inventory to ensure older items are used first. This practice will help minimize waste and keep your produce fresh. Stay vigilant about monitoring conditions and making necessary adjustments to maintain an optimal storage environment.
Adapting Your Cellar for Seasonal Changes
As the seasons change, so too should your approach to managing your root cellar. In colder months, ensure your insulation is sufficient to prevent freezing temperatures. Consider adding extra layers of straw or sawdust for added protection.
During warmer months, focus on maintaining proper ventilation to prevent overheating. Adjust your ventilation system as needed to facilitate airflow and regulate temperature. By adapting your root cellar to seasonal changes, you can ensure its effectiveness year-round.
Frequently Asked Questions
- How deep should my root cellar be?
- Which fruits and vegetables store best in a root cellar?
- Can I convert my existing basement into a root cellar?
- What are common mistakes when building a root cellar?
Building a root cellar is an investment in food security and sustainability. By understanding the essentials of construction, ventilation, and storage, you can create a reliable storage space for your produce. With careful planning and regular maintenance, your root cellar can become an invaluable asset to your homesteading lifestyle.
How deep should my root cellar be?
The depth of your root cellar depends on your climate and soil conditions. Generally, a depth of 10 feet is recommended to take advantage of the earth’s natural insulation. This depth helps maintain a consistent temperature and protects against freezing in colder climates.
Which fruits and vegetables store best in a root cellar?
Root vegetables like potatoes, carrots, and beets are ideal for root cellar storage due to their ability to thrive in cool, humid conditions. Apples, pears, and cabbage also store well in a root cellar. Avoid storing leafy greens and soft fruits, as they are more prone to spoilage.
Can I convert my existing basement into a root cellar?
Yes, converting a basement into a root cellar can be a viable option. Ensure the space is well-insulated and has proper ventilation to maintain optimal temperature and humidity levels. Consider adding shelving and bins to organize your produce effectively.

Related Posts
-
 How to Create Flavorful Leek Stocks and Purees for Preservation
- How to Store Root Vegetables for Long-Term Freshness
- [Video] 7 Tasty Ways to Enjoy Microgreens
- Best Summer Squash Pickling Recipes & Harvest Preservation Tips
- Vacuum Sealing Fresh Vegetables: Best Storage Tips & Tricks
- [Video] 6 Tips for Extending Your Summer Vegetable Harvest


