How to Grow Potatoes In Hay Bales: A Complete Guide

Hay bale gardening can be a great method for those with limited garden space, and potatoes do especially well using this method. Here’s a helpful guide on how to grow potatoes in hay bales (or straw bales)…
- Hay bale gardening lets you grow potatoes almost anywhere — no tilling, no rocky soil problems, and no back-breaking digging at harvest time.
- Potatoes grown in hay bales come out clean, undamaged, and ready to store, because the loose material never compacts around them the way soil does.
- You only need 2–3 seed potato cuttings per bale, planted 16–18 inches deep, and the bale does most of the work for you during the growing season.
- Conditioning your bale before planting is the step most beginners skip — and it’s the single biggest reason hay bale potato crops fail.
- When the season ends, your spent hay bale becomes free compost for next year’s garden beds, making this one of the most efficient growing systems for home gardeners.
Forget everything you know about digging rows and hilling soil — growing potatoes in hay bales is faster, cleaner, and surprisingly more productive than traditional methods!
If you’ve never heard of straw bale or hay bale gardening, it involves planting your garden in bales of hay or straw, usually with some sort of compost or manure added on top.
It’s a super easy method of gardening (although it does have its drawbacks), and it’s great for people without a lot of garden space, with tainted soil, or for those with disabilities, as it doesn’t require any digging, and your garden will be easier to access.
Many different types of vegetables can be successfully grown in hay bales. Potatoes are just one that does really well using this method – and it’s just about the easiest potato harvest you’ll ever have!
If you’ve ever wrestled a potato fork through heavy clay or watched half your crop get stabbed and damaged during harvest, hay bale growing will feel like a revelation. The concept is simple: instead of planting in the ground, you plant your seed potatoes deep inside a hay or straw bale, let the decomposing organic matter feed the plants naturally, and at harvest time, you simply cut the strings and tip the bale over. Your potatoes tumble out clean, unblemished, and ready to store.
Straw Bale Garden Club, led by Joel Karsten — one of the most recognized voices in bale gardening — has documented this method across dozens of potato varieties with consistently strong results – and we have been growing potatoes almost exclusively in hay bales ourselves for the past 12 years with great success.

Image from www.ncnewsonline.com.
Hay Bales Produce Cleaner, Easier Potato Harvests
The biggest frustration with growing potatoes in traditional garden soil is the harvest. Compacted earth hides tubers, fork tines puncture them, and you’re never quite sure you’ve found them all. Hay bale gardening eliminates every one of those problems at once.
Why Hay Bales Beat Traditional Soil Gardening
In a standard in-ground potato bed, the emerging stem has to push upward through soil that can be heavy, compacted, or waterlogged. That resistance slows the plant down and limits how far tubers can form along the stem. Inside a hay bale, there’s almost zero resistance. The stem climbs easily through loose organic material, and potatoes develop freely along its entire buried length — which is exactly where yield comes from.
Hay bales also drain exceptionally well, which means far less risk of rot during wet summers. At the same time, the decomposing hay generates its own internal warmth and retains a fair amount of moisture (though the bales will still require frequent watering in dry spells). You get a naturally regulated growing environment without any special equipment.
There are a few other practical advantages worth knowing about:
- No crop rotation headaches — since you’re using a fresh bale each season, soil-borne potato diseases don’t carry over the way they do in permanent garden beds.
- Weed pressure is dramatically reduced — hay bales sitting above ground level don’t give weed seeds the dark, moist soil contact they need to germinate.
- Works on any surface — concrete, gravel, compacted hardpan, or a sloped yard. If you can place a bale there, you can grow potatoes there!
- Potatoes come out clean — no soil clinging to the skin, no scrubbing before storage, and no fork marks that cause early spoilage.
What to Expect: A Real-World Yield of 2lbs In, 26lbs Out
Experienced straw bale gardeners consistently report strong yields — some documenting results in the range of putting in roughly 2-4 pounds of seed potato cuttings and pulling out 20 to 26 pounds of finished potatoes per just a few bales. Results will vary based on your variety, your conditioning process, and your local climate, but the yield-per-square-foot ratio is genuinely competitive with traditional row gardening, often exceeding it.
Joel Karsten notes that at least twenty different potato varieties perform well in straw bales, from waxy salad types to large russets. The method isn’t variety-specific — it’s the growing environment itself that drives the results.
What You Need Before You Start
You don’t need much, but what you do need matters. Getting the right bale and the right seed stock from the beginning saves you from troubleshooting problems that are much harder to fix once the season is underway.
Choosing the Right Hay Bales
Both hay and straw bales work, but they behave slightly differently. Straw bales — made from the dry stalks of wheat, oat, or barley after the grain is harvested — are the preferred choice for many bale gardeners. They decompose at a reliable rate, have minimal weed seed content, and condition predictably. Hay bales decompose faster because they contain more leaf and seed material, which means more nitrogen released early in the season, and they also hold water better than straw. That’s a benefit for potato growth, but it also means hay bales may not hold their structure into a second growing year.
Either way, look for bales that are tightly bound with two or three strings, solid enough to hold their shape when laid end-t0-end, and free from visible mold on the exterior (they may mold in the garden later, and that’s natural, but starting with moldy bales means they’re already breaking down and will decompose faster).
We’ve mostly used hay bales in our garden, because we have a clean, organic source of these, and they’re easier for us to come by than straw bales, which can sometimes be tainted with herbicides.
Seed Potatoes vs. Store-Bought Potatoes
Certified seed potatoes are always the better choice. Store-bought potatoes are often treated with a sprout inhibitor that slows or prevents germination, and they may carry diseases that certified seed stock has been tested and cleared for. Purchase certified seed potatoes from a garden center or reputable online supplier, and look for varieties labeled specifically for your region and climate. Cut larger seed potatoes into sections, each containing at least one or two strong eyes, and let the cut surfaces dry and callous over for 24–48 hours before planting to reduce the risk of rot inside the bale.
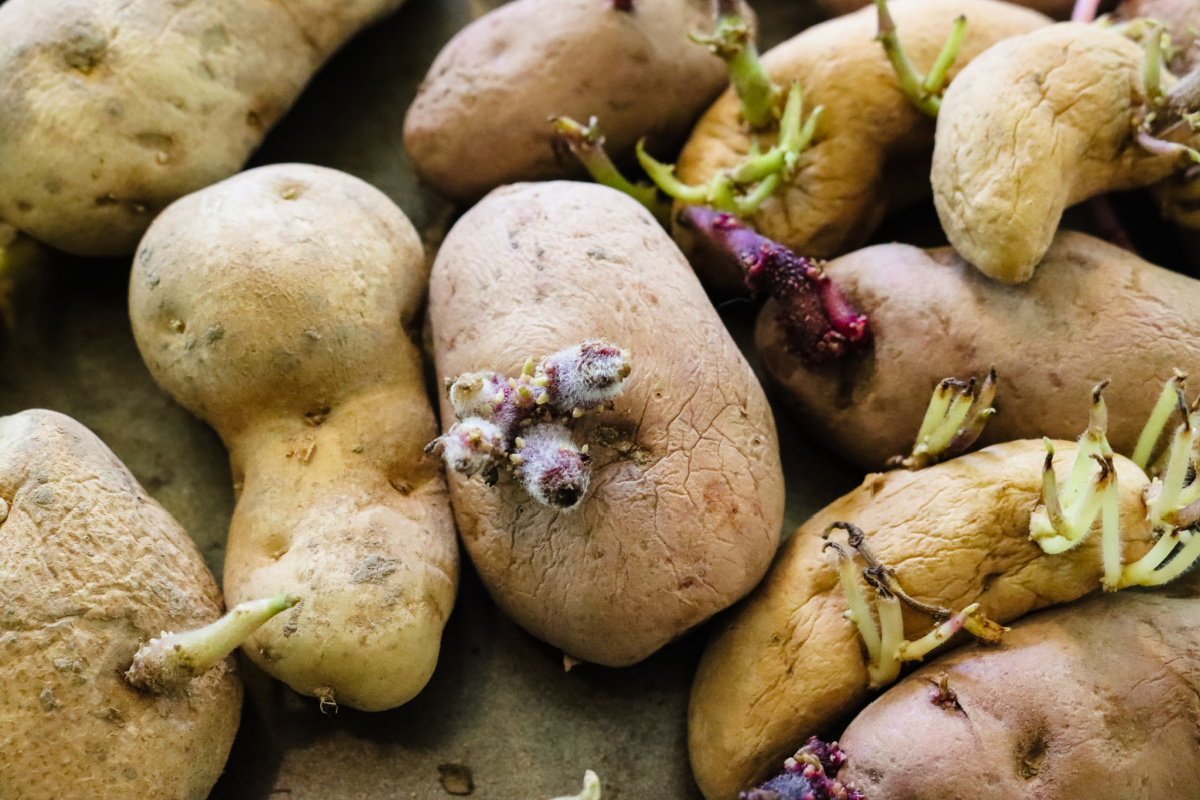
Image from melissaknorris.com.
Best Time of Year to Plant
Timing your planting correctly is critical. Potatoes are temperate-season crops — they prefer soil (or bale) temperatures between 55°F and 70°F at planting, and they don’t tolerate hard frost once sprouted. In most temperate climates, that means planting in early-to-mid spring, roughly two to four weeks after your last expected frost date. If you’re in a warmer climate with mild winters, a fall planting after summer heat breaks can also work well for certain varieties. For more information on straw bale gardening, you can explore this guide to growing potatoes in straw bales.
How to Condition Your Hay Bale Before Planting
Conditioning is the single most important step in hay bale gardening, and it’s the one most beginners skip entirely. A fresh bale is too dry, too dense, and too chemically “cold” to support plant roots. You need to wake it up first.
Why Conditioning Matters
When you water and fertilize a bale repeatedly over 10 days before planting, you’re kick-starting the internal decomposition process. That decomposition does two things: it generates heat that warms the bale interior to the ideal growing temperature, and it begins breaking down the raw organic material into forms that plant roots can actually absorb. A properly conditioned bale becomes a self-contained growing medium — part compost pile, part raised bed, part nutrient reservoir. Skip this step and your seed potatoes will sit in a dry, inert environment with little to feed from. (Note: If you lay your bales in place in the fall, you can skip most of these steps in the spring and just add some fertilizer a week or two before planting, since they will already be wet and starting the decomposition process.)
The 10-Day Conditioning Process
The conditioning schedule is straightforward but requires consistency. Here’s exactly how the 10-day process works:
- Days 1–3: Soak the bale thoroughly with water each day. You want moisture penetrating all the way to the core, not just wetting the surface. Use a hose on a slow trickle laid across the top for 20–30 minutes per day (drip irrigation works perfectly here).
- Days 4–6: Apply a high-nitrogen fertilizer — a half cup of urea (46-0-0) or a lawn-type fertilizer works well — scattered across the top of the bale each day, then water it in deeply. This nitrogen spike feeds the microbes that drive decomposition.
- Days 7–9: Cut the nitrogen application in half. Continue watering the bale thoroughly each day to keep the decomposition process active without overloading it.
- Day 10: Apply a balanced fertilizer (something in the 10-10-10 range) across the top of the bale and water in well. Your bale is now ready to plant. (Note: Potatoes like a slightly acidic growing medium, so we’ve found it’s very helpful to use acidifying fertilizer such as that sold for hydrangeas or blueberries. We use this one from Espoma Organics. This will help to prevent potato scab and increase your yield)
During days four through six, stick your hand into the center of the bale. It should feel noticeably warm — sometimes hot — which confirms that microbial activity is in full swing. If the interior still feels cold and dry, extend the nitrogen application phase by another two days before moving forward.
How to Know Your Bale Is Ready to Plant
A fully conditioned bale feels warm in the center, has a dark and slightly moist interior when you part the material, and smells earthy rather than like dry straw. If you press a thermometer probe into the core and read between 75°F and 100°F, you’re right in the ideal range. Wait until internal temperatures drop below 95°F before planting — anything hotter than that can damage or kill your seed potato cuttings before they even get started.
How to Plant Potatoes in a Hay Bale
Once your bale is conditioned and its internal temperature has settled into a safe planting range, the actual planting process takes less than ten minutes per bale. The key is going deep enough to give your potatoes maximum stem length to work with.
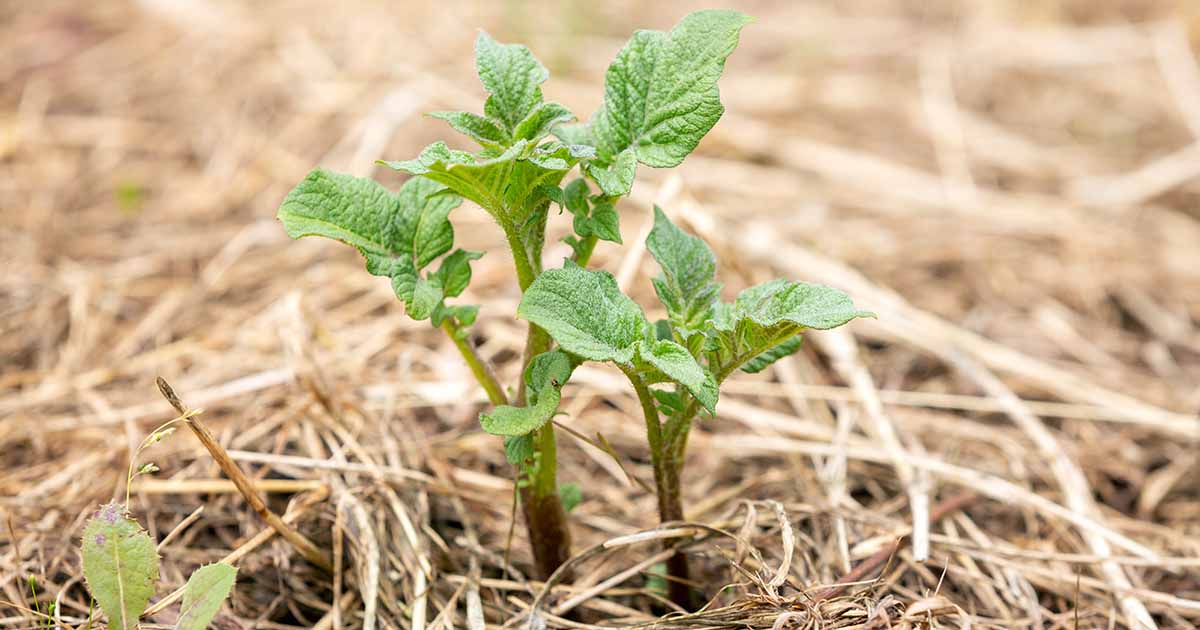
Image from gardenerspath.com.
How Deep to Plant Your Seed Potatoes
A standard rectangular hay or straw bale stands roughly 14 inches tall when placed on its side with the cut ends facing sideways. You want to plant your seed potato cuttings 10-12 inches deep — as close to the bottom of the bale interior as you can get while still leaving the bale structurally intact.
To plant, use a long trowel, a length of rebar, or even a thick wooden stake to pry open a vertical crack in the top of the bale. Work it back and forth until you’ve opened a planting channel that reaches your target depth. Drop your seed potato cutting into the channel with the eye or sprout facing upward, then close the material around it firmly. The bale will hold it in place naturally.
That depth is critical because potatoes don’t just grow from the seed piece itself — they form all along the buried portion of the stem between the seed piece and the soil surface. The more buried stem you create, the more sites for tuber formation you open up. In a ground garden, the stem struggles to push up through more than a few inches of compacted soil, which limits your planting depth and ultimately your yield. Inside a loose hay bale, the stem rises easily through the material with almost no resistance, and potatoes can form all the way up that column.
How Many Potatoes Per Bale
We typically plant up to four to six seed potato cuttings per bale. That spacing gives each plant enough room to develop a strong root system and fill the bale interior with tubers without competing too aggressively for space and nutrients. Space your planting channels evenly across the top surface of the bale so the root systems can spread without crowding each other out.
It might be tempting to squeeze in more cuttings to maximize yield, but overcrowding inside the bale leads to smaller individual tubers and increases the risk of fungal issues in the warm, moist interior. Three to five plants per bale is the number experienced bale gardeners consistently land on — and the yields back it up.
Can You Plant Other Crops on the Same Bale?
Yes — and it’s one of the best features of this method. While your potato plants are developing underground inside the bale, the flat top surface can support shallow-rooted crops like lettuce, herbs, or radishes planted directly into a thin layer of compost or potting mix spread across the top. These surface crops can be harvested early in the season, before the potato vines expand and take over the top of the bale. It’s a smart way to double the productivity of every bale you condition!
How to Care for Your Hay Bale Potato Plants
Hay bale potatoes are relatively low-maintenance once they’re in the ground, but they do have specific needs around water and feeding that differ from in-ground growing. Get these two things right and the bale does the rest.
Watering Requirements
Hay bales drain freely, which is great for avoiding rot — but it also means they dry out faster than a garden bed, especially during hot summer stretches. Plan to water your bales deeply every one to two days during active growth, and every day during heat waves or when rainfall is absent during warm weather. The easiest and most consistent approach is to run a drip irrigation line or soaker hose across the top of each bale and connect it to a timer. This keeps moisture even throughout the bale without you having to think about it daily. Stick your hand four to five inches into the bale material regularly to check — if it feels dry at that depth, water immediately and more deeply than your usual routine.
When to Know Your Potatoes Are Ready to Harvest
The first signal that potatoes are forming inside the bale comes when the plants flower. Once you see blooms appear on the vines, you’re at the earliest point where small “new potatoes” will be present inside the bale. You can carefully reach into the side of the bale at this point and feel around for small tubers without disturbing the main plant — a technique bale gardeners call “bandicooting.”
For a full, mature harvest, wait until the vines begin to yellow and die back naturally, and the stems start to shrivel. This die-back signals that the plant has completed its lifecycle and pushed all remaining energy into the tubers. In most climates, this happens in late summer to early fall, roughly 70 to 120 days after planting depending on your variety.
Avoid cutting the vines back early or pulling the plants before natural die-back — doing so stops tuber development mid-cycle and significantly reduces your final yield. Patience at this stage pays off directly in pounds per bale!
Potato Harvest Timing Guide by Type
Potato Type Days to Maturity Harvest Signal Early / New Potatoes 60–70 days Plants in full flower Mid-Season Varieties 70–90 days Vines beginning to yellow Late / Storage Varieties 90–120 days Vines fully died back
How to Harvest Potatoes From a Hay Bale
This is where hay bale growing delivers its most satisfying payoff. There’s no fork, no shovel, and no frustrating search through dense soil. When your vines have fully died back and you’re ready to harvest, simply cut the bale’s binding strings with a knife and kick the bale over onto a tarp or clean ground surface. The material spreads open and your potatoes are right there — clean, undamaged, and easy to gather by hand!

Image from strawbalegardens.com.
Because there are no metal tines puncturing the skin during harvest, your potatoes may store significantly better than those dug from the ground. Puncture wounds and cuts on potato skin are the primary entry points for mold and rot during storage. Hay bale potatoes come out with skin fully intact, which means they’ll hold up well when wrapped in brown paper and stored in a cool, dark cellar or root storage area for weeks to months depending on the variety.
How to Store Your Hay Bale Potatoes
Because no fork or shovel ever touched your potatoes during harvest, the skin comes out completely intact. That matters more than most people realize. Puncture wounds and cuts on potato skin are the primary entry points for mold and rot during long-term storage. Hay bale potatoes arrive at harvest already clean and unblemished, which gives them a significant storage advantage over traditionally dug potatoes.
Wrap your harvested potatoes individually in brown paper or newspaper and store them in a cool, dark location — a root cellar, unheated basement, or even a dark corner of a garage works well. Ideal storage temperature sits between 38°F and 45°F with moderate humidity. Avoid storing potatoes near apples or onions, as the ethylene gas apples emit speeds up sprouting, and onion moisture promotes rot. Stored correctly, late-season varieties can keep for several months without significant quality loss.
Your Spent Hay Bale Becomes Next Year’s Compost
One of the most underrated benefits of hay bale gardening is what happens after the harvest is done! That spent bale — now partially broken down, full of microbial life, and already dark and crumbly in its interior — is essentially pre-decomposed compost. You’ve spent an entire growing season turning a raw agricultural byproduct into rich organic matter, and it didn’t cost you a single extra hour of effort! Here are a few ways to use your spent bales:
- Spread it directly onto garden beds as a thick mulch layer through the winter to protect soil structure and suppress early spring weeds.
- Till it into existing garden soil in autumn to improve drainage in heavy clay soils or add water retention to sandy ground – or use the core method for more of a no-till approach that accomplishes a similar result.
- Pile it into a dedicated compost bay to finish breaking down over winter, giving you a rich amendment ready to use by planting season.
- Use it as a base layer for raised beds — the hugelkultur approach of filling raised bed frames with decomposing organic matter before topping with soil is a perfect match for spent hay bale material!
- Leave it in place on the surface where it sat all season. It will continue to break down over winter and condition the ground beneath it, which is especially useful if you’re building a new garden area over previously unworked ground.
This closed-loop system is one of the reasons experienced bale gardeners rarely go back to traditional in-ground growing once they’ve tried it. You start the season with a $5 to $10 bale and end it with a free soil amendment — while harvesting a strong yield of clean potatoes in between!
Second-year bales are particularly prized for potato growing – especially if you’re using straw. A bale that hosted a different surface crop in its first season will be further along in the decomposition process, which means its interior is already loose, dark, and nutrient-rich before you even begin conditioning. Many veteran bale gardeners deliberately plan a two-year rotation — surface crops in year one, potatoes in year two — precisely because the results in the second year are so consistently strong.
If you’re gardening on a tight budget, factoring in the compost value of each spent bale makes the cost-per-harvest math look even better. You’re not just buying a growing medium for one season — you’re investing in the long-term fertility of your entire garden.

Image from empressofdirt.net.
Frequently Asked Questions
Hay bale potato growing generates a lot of questions from first-timers and experienced gardeners alike. Here are the ones that come up most often, answered directly from our experience and the reports of other gardeners.
Can You Use Straw Bales Instead of Hay Bales to Grow Potatoes?
Yes — and for some gardeners, straw bales are actually the preferred option. Straw is the dry stalk left after grain crops like wheat, oat, or barley have been harvested, which means it contains far fewer weed seeds than hay. It also tends to decompose at a more predictable rate, making the conditioning process easier to time. Hay bales work well too, especially for potatoes, because their higher nitrogen content from leaf and seed material accelerates internal decomposition and feeds plants aggressively early in the season. Either will produce a strong potato crop — straw just comes with fewer weed surprises, though it also doesn’t hold water as well until it is fairly decomposed.
How Many Potatoes Should You Plant Per Hay Bale?
Plant three to six seed potato cuttings per bale, depending on your available space and seed potatoes. That number gives each plant room to develop a full root system and fill the bale interior with tubers without overcrowding. Spacing your planting channels evenly across the top of the bale ensures the underground root systems spread without competing against each other for moisture and nutrients. Going beyond four plants per bale tends to produce more plants with smaller individual tubers — not the outcome most gardeners are aiming for.
Do You Need to Hill Hay Bale Potatoes Like You Do in Soil Gardens?
No — and this is one of the most practical advantages of the bale method! Traditional in-ground potato growing cans repeated hilling, where you mound soil up around the base of the plant as it grows to give the stem more buried length for tuber formation. In a hay bale, that work is already done for you at planting time. By placing your seed potato cuttings 10 to 12 inches deep inside the bale, you’ve already created the maximum buried stem length the plant needs. The loose bale material naturally supports the plant as it grows upward, with no additional intervention required.
Can You Grow Sweet Potatoes in Hay Bales?
Sweet potatoes are technically possible in hay bales, but they come with some important caveats. Unlike regular potatoes, sweet potatoes are a warm-season crop that need consistently high soil temperatures — at least 65°F — and a much longer growing season, typically 90 to 170 days depending on the variety. They also spread aggressively through long trailing vines that will quickly overwhelm a single bale.
If you’re determined to try it, use a well-conditioned bale in full sun, plant sweet potato slips rather than seed pieces (no more than two per bale), and give the vines plenty of space to roam. In warmer climates with long growing seasons, gardeners have reported reasonable results. In shorter-season climates, standard potatoes are a far more reliable choice for bale growing.
What Do You Do With the Hay Bale After the Potato Harvest?
After harvest, your spent hay bale is essentially a finished or near-finished compost pile sitting in your garden! The interior will be dark, crumbly, and full of the microbial life that drove your potato crop all season. This material is genuinely valuable — don’t let it go to waste.
The simplest option is to spread the broken-down bale material directly over your garden beds as a winter mulch. It protects soil structure from freeze-thaw cycles, suppresses early spring weeds, and continues decomposing slowly to add organic matter to the soil beneath. Alternatively, pile it into a compost bay to finish over winter and use it as a planting amendment the following spring.
If you’re planning to run a second season of bale gardening, consider whether your potato bales from year one are still structurally sound enough to condition and replant. Many experienced bale gardeners find that second-year bales — already partially decomposed — are actually the most productive environment for potatoes, delivering even stronger yields than first-year bales with less conditioning effort required. Plan your bale rotation accordingly and the whole system compounds in efficiency year after year.
Here are some more photos from our own hay bale garden.

Related Posts
-
 5 Easy Veggies to Grow From Seed In Your Garden
- [Video] The RIGHT Way to Prune Tomato Plants
- 4 Tips for Growing More Food In An Urban Garden
- [Video] How to Prepare Potatoes for Planting
- Sustainable Gardening Guide: Growing Organic Chard from Seed to Harvest
- [Video] How to Grow Tasty Bean Sprouts Indoors


