Sustainable Gardening Guide: Growing Organic Artichokes

Growing organic artichokes in your garden can be a highly rewarding experience. With the right care & attention, you’ll be able to enjoy fresh, home-grown artichokes from your own backyard!
Key Takeaways:
- Artichokes are perennial plants that thrive in organic gardens with proper climate conditions (USDA zones 7-11), well-draining, fertile soil with a neutral pH, and full sun exposure.
- Popular organic artichoke varieties include Green Globe, Imperial Star, Purple of Romagna, and Violetto, each with unique characteristics suitable for different growing conditions.
- Starting artichokes from seeds requires patience with a 10-14 day germination period, while divisions offer faster results for established plants.
- Artichokes serve dual purposes as both edible crops and stunning ornamental plants, reaching 3-5 feet in height with silvery foliage and vibrant purple flowers if left unharvested.
Growing organic artichokes transforms your garden into a sustainable food system while creating a visually stunning landscape! These architectural plants offer both culinary delights and ecological benefits that extend beyond your dinner plate. With their striking silver-green foliage and potential for producing magnificent purple thistle flowers, artichokes deliver years of harvests when properly maintained using organic methods.
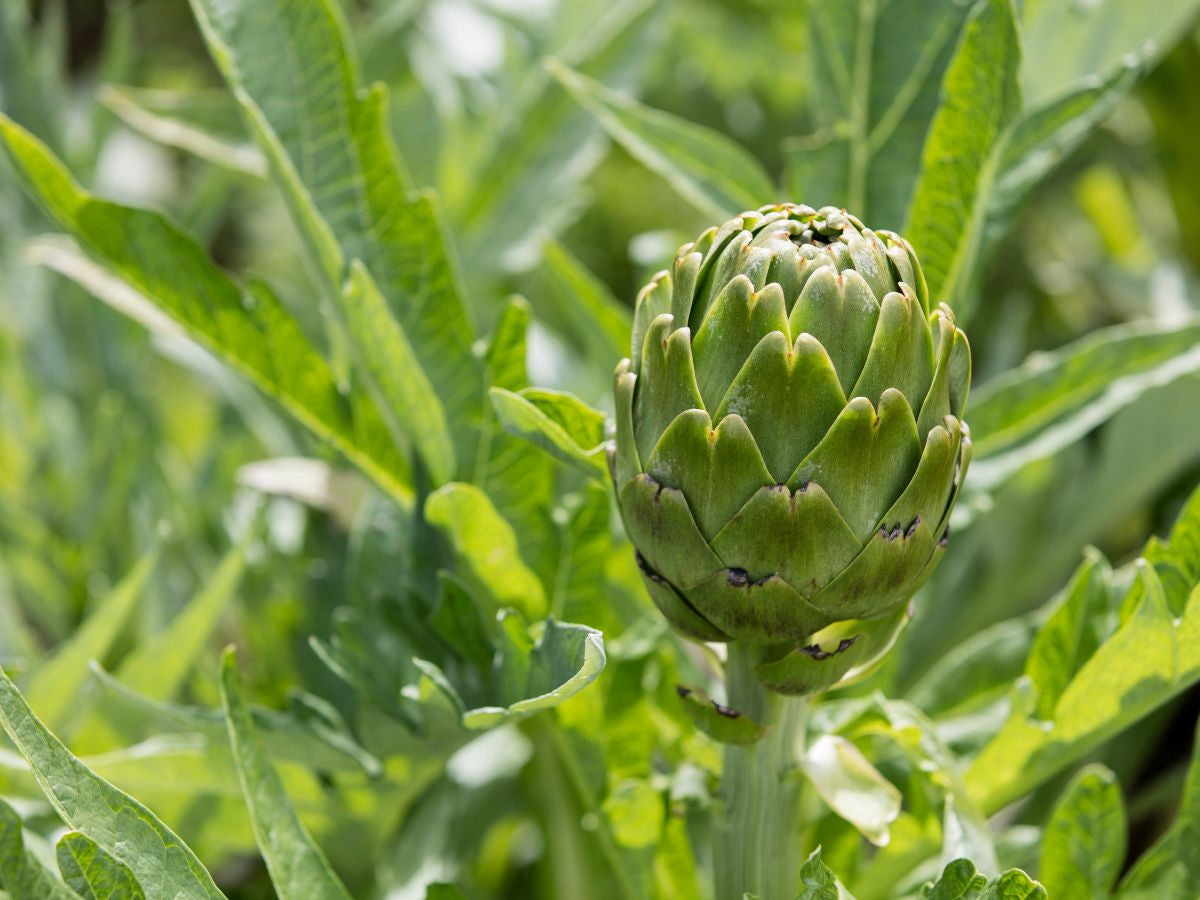
Image from sowrightseeds.com.
Why Organic Artichokes Deserve a Place in Your Garden
Organic artichokes stand as a testament to the beauty of edible landscaping, commanding attention with their dramatic architectural form while providing nutrient-dense food. These perennial plants can produce for 5-7 years in suitable climates, offering an impressive return on your initial planting investment! Beyond their practical food value, artichokes support beneficial insects and pollinators when allowed to flower, creating a miniature ecosystem within your garden space.
Conventionally grown artichokes often contain pesticide residues that can be difficult to remove due to their intricate structure, making organic growing methods particularly valuable for this crop. By cultivating your own, you’ll enjoy chemical-free artichokes with superior flavor and texture compared to their store-bought counterparts. The satisfaction of harvesting these delicacies straight from your garden and preparing them within hours ensures you’ll experience their sweet, nutty flavor at its absolute peak!
Perfect Growing Conditions for Thriving Artichokes
Understanding the ideal growing environment for artichokes is fundamental to organic success. These Mediterranean natives have specific preferences that, when met, result in robust plants and abundant harvests. Let’s explore the key environmental factors that contribute to healthy, productive artichoke plants.
Climate Requirements: Finding Your Artichoke Sweet Spot
Artichokes thrive as perennials in USDA hardiness zones 7-11, where winters are mild and summers aren’t excessively hot. They prefer cool, foggy summers with temperatures between 55-75°F (13-24°C) during their main growing season. In colder regions (zones 5-6), you can still enjoy these delicacies by growing them as annuals or providing substantial winter protection.

Image from sowrightseeds.com.
Microclimates within your garden can significantly impact artichoke success. Planting against a south-facing wall creates a warm pocket that can extend your growing season and protect plants from harsh winter conditions. Coastal gardens often provide ideal conditions naturally, with their moderate temperatures and moisture-laden air that artichokes adore.
Temperature Tolerance Chart for Artichokes
Minimum temperature for perennial growth: 20°F (-6°C)
Ideal growing temperature range: 55-75°F (13-24°C)
Temperature that triggers dormancy: Below 50°F (10°C) or above 85°F (29°C)
Temperature for seed germination: 70-80°F (21-27°C)
Soil Preparation That Promotes Healthy Growth
Artichokes demand rich, well-draining soil with abundant organic matter to support their vigorous growth and extensive root systems. Begin soil preparation by incorporating 4-6 inches of compost or well-rotted manure into your planting area, working it to a depth of 12-18 inches. This deep preparation accommodates the plant’s substantial taproot and provides the fertility needed for multiple years of production.
Soil pH between 6.5-7.5 creates the optimal environment for nutrient availability and uptake. In more acidic soils, incorporate garden lime according to soil test recommendations several months before planting. Heavy clay soils benefit from additional amendments like coarse sand or perlite to improve drainage, as artichokes are susceptible to root rot in waterlogged conditions.
A raised bed environment often provides ideal conditions for artichokes, offering both the excellent drainage and rich soil these plants crave. Building beds 18-24 inches high with compost-enriched soil creates the perfect foundation for long-term artichoke success. The elevated position also helps protect roots from winter waterlogging in regions with heavy seasonal precipitation.
Sunlight and Water Needs Throughout the Season
Artichokes require full sun exposure (6-8 hours daily) to produce abundant buds, though they appreciate slight afternoon shade in regions with intense summer heat. Their large leaves transpire significant moisture, making consistent watering essential for quality production. Aim for deep, thorough irrigation that reaches the extensive root system rather than frequent shallow watering that promotes surface roots.
Drip irrigation proves particularly effective for artichokes, delivering water directly to the root zone while keeping foliage dry, which helps prevent fungal issues. During peak growth and bud formation, provide approximately 1-2 inches of water weekly, adjusting based on rainfall and temperature. A 3-4 inch layer of organic mulch around plants helps retain soil moisture, suppress weeds, and moderate soil temperature fluctuations. For more detailed guidance on artichoke cultivation, check out this helpful guide to growing artichokes.
Top Artichoke Varieties for Organic Gardens
Selecting the right artichoke variety can significantly impact your growing success and culinary satisfaction. Different cultivars offer varying levels of cold tolerance, production timing, and flavor profiles. Consider your climate conditions and growing goals when choosing from these outstanding organic options. For those interested in improving soil quality for better growth, check out these cheap and easy ways to build garden soil over the winter.
- Productivity: Some varieties produce many small buds, while others develop fewer but larger heads
- Cold hardiness: Critical for perennial growing in borderline zones
- Maturation speed: Important for annual production in colder climates
- Flavor profile: Ranging from mild and sweet to more complex and nutty
- Ornamental value: Foliage color and texture can enhance landscape design
Green Globe: The Classic Choice
Green Globe represents the gold standard for home gardeners, producing traditional large, round artichoke heads with excellent flavor. This heirloom variety typically yields 3-5 primary buds per plant in its first year, increasing to 10-12 in subsequent seasons when grown as a perennial. Its deep green buds with slight purple tinting develop sweet, tender hearts that shine in simple preparations where their delicate flavor can take center stage!

Image from www.monrovia.com.
Imperial Star: Perfect for Annual Growing
Imperial Star revolutionized artichoke cultivation by enabling successful annual production in regions too cold for perennial growing. This variety matures quickly in a single season without requiring vernalization (exposure to cold) to trigger bud formation. Its compact growth habit, reaching only 3-4 feet in height and width, makes it suitable for smaller gardens and container growing, where space efficiency matters.
The spineless bracts of Imperial Star make harvesting a more pleasant experience than working with pricklier varieties. Plants typically produce 6-8 primary buds measuring 3-4 inches in diameter, with a tender texture and excellent buttery flavor. For gardeners in zones 3-6, this variety offers the most reliable path to successful artichoke harvests without winter protection strategies.
Purple of Romagna: A Colorful Alternative
This Italian heirloom brings distinctive beauty to the artichoke patch with its deeply purple-tinged buds that stand out dramatically against silvery foliage. Purple of Romagna produces medium-sized artichokes with exceptional tenderness and a more complex, nutty flavor profile compared to green varieties. The elongated, conical shape of its buds offers a higher proportion of edible heart to outer bracts, maximizing the yield of the most prized part of the artichoke.
While less cold-hardy than some green varieties, Purple of Romagna performs beautifully in Mediterranean climates and coastal areas where winter temperatures rarely drop below 25°F (-4°C). Its striking appearance makes it equally valuable as an edible and ornamental plant, creating visual interest in both dedicated vegetable gardens and integrated edible landscapes.
Violetto: Cold-Hardy and Flavorful
Violetto stands out among purple artichoke varieties for its impressive cold tolerance, making it suitable for perennial growing in zones as cold as 6 with proper winter protection. This Italian variety produces medium-sized, slightly elongated buds with vibrant purple coloration and exceptional flavor concentration. Many artichoke connoisseurs consider Violetto’s nutty, complex taste profile superior to green varieties, particularly when harvested young.

Image from www.siskiyouseeds.com.
Beyond its culinary qualities, Violetto offers extraordinary ornamental value with its striking silvery-gray foliage and architectural form. If allowed to flower, its massive purple thistle blooms create dramatic focal points in the landscape. This versatility makes Violetto an excellent choice for gardeners seeking both beauty and functionality from their edible plantings.
Starting Your Organic Artichoke Patch
Establishing healthy artichoke plants forms the foundation for years of abundant harvests. Whether you choose seeds or divisions, proper planting techniques significantly impact long-term success. Strategic timing and preparation create the conditions for vigorous growth right from the start.
Seeds vs. Divisions: Which Method Works Best
Starting artichokes from seed offers the widest variety selection and lowest initial cost but requires patience and careful attention. Seeds typically germinate within 10-14 days when maintained at 70-75°F (21-24°C) with consistent moisture. Begin seeds indoors 8-12 weeks before your last spring frost date to give plants a head start on the growing season. Use deep pots (at least 4 inches) to accommodate the seedlings’ early taproot development without restriction.
Divisions from established plants provide instant gratification with more mature specimens that often produce in their first season. When dividing artichokes in early spring, select sections from the outer edges of the plant containing at least one growth shoot and a portion of the root system. Plant divisions immediately and water thoroughly to minimize transplant shock. This propagation method ensures offspring identical to the parent plant, maintaining the qualities you’ve come to appreciate.
For most home gardeners, a combination approach works well—starting with purchased plants or divisions to enjoy earlier harvests while experimenting with seed varieties for future expansion. Regardless of your starting method, strong, healthy specimens with well-developed root systems establish more readily and produce more abundantly in their first year.
Proper Planting Depth and Spacing
Artichokes develop into substantial plants requiring generous spacing for proper air circulation and maximum productivity. Position plants 3-4 feet apart within rows and space rows 4-6 feet apart to accommodate their mature spread. This seemingly excessive spacing prevents the fungal issues that can develop when dense foliage remains wet after rain or irrigation, while also providing necessary access for harvesting.
Plant seedlings or divisions at the same depth they previously grew, with the crown sitting just at soil level. Deeper planting risks crown rot in wet conditions, while shallow placement exposes roots to drying and temperature fluctuations. Water thoroughly after planting to eliminate air pockets around roots and help establish soil contact that supports nutrient uptake.
Timing Your Planting for Maximum Success
In mild-winter regions (zones 8-10), fall planting gives artichokes a significant advantage, allowing root establishment during the cool, wet season before spring growth begins. Plants established in autumn typically produce larger yields in their first harvest season compared to spring-planted artichokes. Aim to plant 4-6 weeks before your first fall frost date to balance establishment time with winter preparation.
For colder areas where artichokes grow as annuals or marginally perennial plants, spring planting after all danger of frost has passed works best. In zones 6-7, where winter survival is possible with protection, establish plants in early spring to maximize growth before winter dormancy. Regardless of your planting season, choose overcast days or evening hours to reduce transplant stress, and water deeply immediately after planting.
Natural Feeding Schedule for Robust Plants
Artichokes qualify as heavy feeders, requiring abundant nutrients to support their impressive vegetative growth and bud development. A consistent organic feeding program sustains plant health while building soil fertility for future seasons. Strategic fertilization timing maximizes growth during key developmental stages while minimizing waste and environmental impact.

Image from savvygardening.com.
Compost and Organic Matter: The Foundation
High-quality compost provides the nutritional foundation for thriving artichoke plants, delivering slow-release nutrients alongside beneficial microorganisms that enhance soil structure. Apply 2-3 inches of finished compost around established plants each spring as growth resumes, keeping it slightly away from direct stem contact to prevent potential rot issues. This annual compost application feeds both the plant and the soil food web, creating self-perpetuating fertility cycles that reduce the need for additional inputs over time.
Diversify your organic matter sources to provide a complete spectrum of nutrients—combine homemade compost with aged manure, leaf mold, and trace mineral sources like kelp meal for comprehensive nutrition. For established perennial plantings, consider applying compost as a side dressing twice yearly—once in early spring as growth begins and again after the main harvest to support fall growth and winter hardiness.
Natural Fertilizers for Different Growth Stages
Support robust early-season leaf development with nitrogen-rich organic fertilizers like blood meal, fish emulsion, or composted poultry manure applied when plants reach 12 inches in height. This initial feeding promotes the strong vegetative growth needed to fuel subsequent bud production. Dilute liquid fertilizers to half strength and apply weekly during this active growth phase, or incorporate granular options into the soil according to package directions.
As plants approach bud formation, transition to balanced or phosphorus-rich formulations that support flower bud development and enhance overall plant resilience. Organic fertilizers like bone meal (high in phosphorus) or kelp meal (rich in micronutrients) applied 4-6 weeks before anticipated bud formation improve both yield and quality. Remember that over-fertilization can be as problematic as nutrient deficiency—excessive nitrogen produces lush foliage at the expense of bud formation, while also increasing susceptibility to pests and diseases.
Pay particular attention to potassium levels in late summer and fall for perennial plantings, as this nutrient significantly impacts winter hardiness. Rock powders like greensand or hardwood ash provide slow-release potassium that helps strengthen cell walls and improve cold tolerance. This late-season nutrition proves especially valuable for borderline-hardy artichoke varieties or plants grown at the cooler edge of their climate range.
Organic Pest Management Strategies
Maintaining a pest-resistant artichoke patch begins with prevention through strong cultural practices. Healthy, stress-free plants naturally resist many common pests, making proper watering, feeding, and spacing your first line of defense. The diverse ecosystem of an organic garden provides natural checks and balances that minimize pest outbreaks while supporting beneficial insect populations.
When preventative measures aren’t enough, understanding the specific pests affecting your plants allows for targeted interventions that preserve the beneficial organisms in your garden. Timing your observations and treatments to coincide with pest life cycles maximizes effectiveness while minimizing the need for intervention.

Image from morningchores.com.
Common Artichoke Pests and How to Spot Them
Aphids pose the most frequent challenge for artichoke growers, clustering on tender new growth and under leaves where they extract plant sap. Their feeding can distort leaves and potentially transmit viruses between plants. Look for sticky honeydew, ant activity, or curled leaves as early warning signs of aphid presence before populations explode. Regular inspection of stem junctions and leaf undersides catches infestations when they’re most manageable.
Slugs and snails gravitate to the moist environment artichoke plants create, causing distinctive ragged holes in foliage and leaving silvery slime trails as evidence. These nocturnal feeders can seriously damage young plants but typically cause only cosmetic damage to established specimens. Conduct evening inspections with a flashlight to confirm their presence when damage appears, but culprits remain unseen during daylight hours.
Artichoke plume moths lay eggs that hatch into caterpillars that tunnel into developing buds, causing brown trails and damaged tissue that ruins harvests. Their presence often goes undetected until you cut open affected artichokes and find their tunneling damage. Watch for small holes in buds with surrounding frass (caterpillar excrement) as early warning signs of infestation.
Beneficial Insects That Protect Your Crop
Ladybugs and their larvae serve as voracious aphid predators, with a single adult consuming up to 50 aphids daily. Create a ladybug-friendly environment by planting nectar-rich flowers like sweet alyssum, calendula, and cilantro throughout your garden. These beneficial insects require these supplemental food sources when pest populations decline, ensuring they remain established in your garden ecosystem.
Parasitic wasps offer invisible but powerful pest control by laying eggs inside aphids, caterpillars, and other problem insects. The developing wasp larvae consume their host from within, eventually emerging as adults to continue the beneficial cycle. These tiny beneficial insects require pollen and nectar sources from small-flowered plants like dill, fennel, and Queen Anne’s lace to thrive in your garden.
Ground beetles patrol the soil surface at night, consuming slugs, snails, caterpillars, and other soft-bodied pests before they can damage your artichokes. Create beetle habitat by maintaining areas of undisturbed mulch and avoiding broad-spectrum organic pesticides that might harm these beneficial predators. Even organic controls like diatomaceous earth can impact beneficial ground insects, so apply such remedies only as targeted treatments rather than broadcast applications.
Plant-Based Sprays and Barriers
Neem oil provides effective, broad-spectrum pest control while remaining gentle on beneficial insects when properly applied. This plant-derived oil disrupts insect feeding and reproduction while coating leaf surfaces with compounds that deter pest establishment. Apply neem as a foliar spray in the early morning or evening when beneficial insects are less active, focusing on thorough coverage of leaf undersides where many pests hide.
Garlic-pepper spray creates an effective repellent for many soft-bodied insects while being completely non-toxic to humans and wildlife. Combine 6 cloves of crushed garlic, 1 tablespoon of hot pepper flakes, and 1 tablespoon of biodegradable soap in 1 gallon of water, strain after 24 hours, and spray directly on affected plants. This homemade solution leaves no harmful residue and can be applied up to the day of harvest without food safety concerns.
Physical barriers like floating row covers provide excellent protection from flying pests while still allowing light, air, and water to reach plants. Secure covers around young artichoke plants until they develop sufficient size to withstand minor pest damage. For established plants, consider seasonal protection during peak pest pressure periods, removing covers during flowering if you wish to allow pollinator access or encourage beneficial insect activity.
Disease Prevention Without Chemicals
Organic disease management relies primarily on prevention through proper cultural practices and variety selection. Understanding the environmental conditions that favor common artichoke diseases allows you to modify growing conditions to discourage pathogen development before it requires intervention.
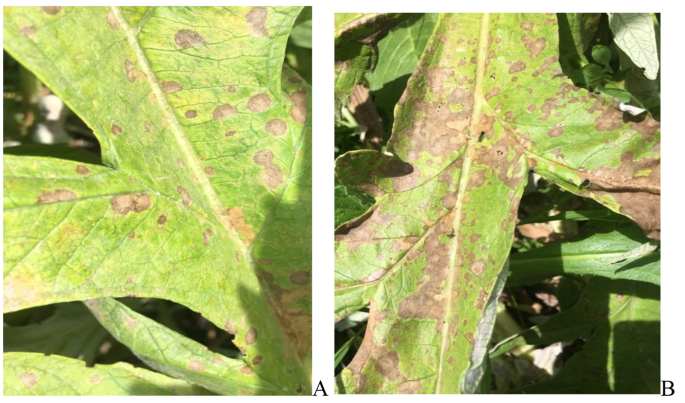
Image from link.springer.com.
Keeping Powdery Mildew at Bay
Powdery mildew manifests as white powdery patches on leaves, eventually causing premature yellowing and reduced photosynthesis that weakens plants. This fungal disease thrives in humid conditions with poor air circulation, but, unlike many fungi, doesn’t require standing water for spore germination. Maintain proper plant spacing (3-4 feet between plants) to allow air movement through foliage, and position artichokes where morning sun quickly dries leaves after dew or rain.
Preventative applications of diluted milk spray (1 part milk to 9 parts water) create an unfavorable environment for powdery mildew establishment when applied weekly during vulnerable periods. The milk proteins interact with sunlight to create antimicrobial conditions on leaf surfaces without harming the plant or beneficial organisms. Combine this approach with bottom watering techniques such as drip irrigation that keep foliage dry for comprehensive mildew prevention.
Preventing Root Rot in Wet Conditions
Root rot, caused by various soil-borne fungi, presents as wilting despite moist soil, yellowing lower leaves, and stunted growth as it progresses. These pathogens thrive in waterlogged conditions where roots cannot access sufficient oxygen. Improve drainage in heavy soils by incorporating organic matter and possibly creating raised planting areas that elevate roots above potential standing water after heavy rains.
Avoid overhead irrigation that splashes soil onto plant stems, potentially transferring soil-borne pathogens to vulnerable plant tissue. Drip irrigation or soaker hoses deliver water directly to the root zone while keeping foliage and stems dry, significantly reducing disease transmission. Maintaining a 2-3 inch layer of coarse organic mulch around plants (kept slightly away from stems) further reduces splash-related disease spread while improving soil health.
Maintenance Tips for Productive Plants
Regular maintenance keeps artichoke plants productive and attractive while preventing many common problems before they develop. For more detailed guidance, check out this artichoke planting guide. A consistent care routine throughout the growing season maximizes both yield and plant longevity with minimal effort.
Mulching for Moisture and Weed Control
Apply a 3-4 inch layer of organic mulch around established artichoke plants to conserve soil moisture, suppress weeds, and gradually improve soil structure as it breaks down. Straw, shredded leaves, or wood chips work effectively, though avoid placing mulch directly against plant stems where it might promote rot. Refresh mulch layers annually in spring as new growth emerges, adding the partially decomposed previous layer to your compost pile where it can complete its transformation into humus.
Strategic mulching moderates soil temperature fluctuations that can stress artichoke roots, keeping the soil cooler in summer and providing insulation during cold weather. This temperature buffering proves particularly valuable for borderline-hardy varieties or plants grown at the edges of their climate adaptability. In hot summer regions, lighter-colored mulches like straw reflect heat away from the soil, helping maintain the cooler root conditions artichokes prefer.
Pruning and Thinning for Better Air Circulation
Remove damaged, diseased, or yellowing lower leaves throughout the growing season to improve air circulation and reduce potential disease reservoirs. This selective pruning directs the plant’s energy toward new growth and bud production while creating less hospitable conditions for pests and pathogens. Use clean, sharp pruners and dispose of removed material away from your garden rather than composting potentially infected foliage.
In mature plantings, thin overcrowded shoots in early spring, removing weaker stems to focus the plant’s energy on producing fewer but larger buds. This selective thinning mimics the natural process of succession in perennial plants while maximizing harvest quality. Retain 4-6 of the strongest shoots per plant for optimal production, removing others at ground level rather than leaving stubs that might invite disease.
Harvesting Organic Artichokes at Peak Flavor
Harvesting artichokes at the perfect moment maximizes both flavor and tenderness. The precise timing dramatically impacts eating quality, with just days making the difference between a tender delicacy and a tough, fibrous disappointment. Learning to recognize the subtle signs of peak maturity ensures consistently excellent harvests.

Image from homesteadandchill.com.
Signs Your Artichokes Are Ready to Pick
Harvest artichokes when the buds reach full size but before the bracts (the overlapping leaves forming the bud) begin to open or separate at the top. The buds should feel firm and tight when gently squeezed, with bracts that remain closely pressed together. Size varies by variety but typically ranges from 3-5 inches in diameter for main buds when ready for harvest. Secondary buds developing later in the season will be smaller but should show the same tight bract formation when ready.
Pay attention to bract color and texture as harvest indicators. Mature Green Globe artichokes develop a slight glossy sheen, while purple varieties like Violetto show intense coloration when ready. Testing one bud by harvesting and cooking can help you calibrate your eye to the perfect harvest stage for your specific varieties. Remember that artichokes harvested too early lack size and flavor development, while those picked too late develop increased toughness and a fuzzy choke that becomes difficult to remove.
Proper Cutting Techniques That Don’t Damage Plants
Use a sharp knife or pruners to cut artichoke stems 1-2 inches below the bud, making clean, angled cuts that shed water rather than collecting it. This stem length provides both handling convenience and extended freshness by giving the harvested bud access to stem moisture. Always use clean, sharp tools to minimize damage to remaining plant tissue and reduce the risk of disease introduction through ragged cuts.
Harvest during cool morning hours when buds contain maximum moisture and sugars, placing cut artichokes in a basket or container that prevents damage to their delicate bracts. Handle harvested buds carefully by their stems to avoid bruising or breaking the bracts, which quickly leads to browning and reduced quality. Immediate refrigeration after harvest slows the conversion of sugars to starch, preserving the sweet flavor that makes fresh-picked artichokes so superior to store-bought alternatives.

Image from kellogggarden.com.
Extending Your Harvest Season
Stagger your harvesting approach to maximize the productive period from each plant. Remove the central terminal bud when it reaches proper size, which stimulates the plant to develop multiple secondary buds along the stem. These secondary buds will mature over the following weeks, extending your harvest period significantly. While smaller than the terminal bud, these secondary artichokes often offer a more tender texture and concentrated flavor that many connoisseurs actually prefer!
For fall and winter harvests in mild climates, cut back spring-harvested plants by approximately one-third in late summer. This pruning stimulates fresh growth that produces a smaller but valuable autumn crop. In regions with distinct seasons, this second harvest often coincides with cooling temperatures that enhance flavor complexity and sweetness. Protect these late-season buds from early frosts with floating row covers to extend the productive season even further.
Artichokes as Perennials: Year-Round Care
Treating artichokes as perennials requires a full-cycle approach to maintenance that changes with the seasons. These long-lived plants reward proper care with increasing yields for up to 5-7 years before productivity begins to decline. Understanding their seasonal needs helps you maximize both annual harvests and overall plant longevity.

Image from www.hobbyfarms.com.
Establish a seasonal care calendar that reminds you of critical maintenance tasks throughout the year. Spring rejuvenation, summer production, fall preparation, and winter protection each require specific approaches that build on previous care to maintain plant health through multiple growing cycles. This consistent attention creates stronger, more resilient plants that withstand environmental stresses while delivering exceptional harvests.
Winter Protection Methods in Cold Climates
In zones 5-7 where winter temperatures occasionally drop below 20°F (-6°C), artichokes require protection to survive as perennials. After the first light frost triggers dormancy, cut plants back to about 12 inches and cover the crown and remaining stems with a thick 8-12 inch layer of straw, leaves, or other insulating material. This protective layer maintains soil temperatures above the critical damage threshold for roots and crown tissue throughout winter dormancy.
For additional protection in borderline zones, place an inverted bushel basket or large pot over the trimmed plant before adding mulch, creating a double insulation layer that traps air and further buffers against temperature extremes. Remove winter protection gradually in spring as temperatures stabilize, allowing light exposure while maintaining some protection against late frosts. This transition period helps plants resume growth without the shock of sudden exposure to spring temperature fluctuations.
Dividing Established Plants for Continued Production
Divide artichoke plants every 3-4 years to maintain vigor and productivity, ideally performing this rejuvenation in early spring just as new growth begins to emerge. Carefully dig around and under the plant with a garden fork, lifting the entire root mass while minimizing damage to the fleshy roots. Separate the plant into sections, ensuring each division contains both roots and at least one visible growth point or emerging shoot.
Replant the strongest divisions immediately in freshly prepared soil enriched with compost, positioning them at the same depth they previously grew. Water thoroughly after replanting and apply a balanced organic fertilizer to support rapid establishment. This division process not only rejuvenates your existing plants but also provides free starts to expand your artichoke patch or share with fellow gardeners.
The Double Life of Artichokes: Edible and Ornamental
Artichokes seamlessly bridge the divide between vegetable garden and ornamental landscape with their architectural form and striking silvery foliage. These dual-purpose plants reach 3-5 feet in height and spread, creating dramatic vertical elements in garden design! Their unique texture and color contrast beautifully with traditional landscape plants while providing practical harvests throughout the growing season.
The ornamental value extends beyond foliage when plants are allowed to flower, producing spectacular purple thistle blooms measuring 5-7 inches across on tall stems. These dramatic flowers attract abundant pollinators while serving as stunning cut flowers with exceptional vase life. After flowering, the dried seed heads create winter interest in the landscape, adding year-round design value to these practical plants.
| Artichoke Stage | Edible Value | Ornamental Value |
|---|---|---|
| Vegetative Growth | Young leaves can be blanched for salads | Silver-green architectural foliage |
| Bud Formation | Peak harvest stage for traditional eating | Sculptural buds on strong stems |
| Flowering | No longer edible | Spectacular purple thistle blooms |
| Seed Formation | Seeds can be roasted like sunflower seeds | Textural dried seed heads for winter interest |
Strategic placement maximizes both the ornamental and edible value of artichokes in your landscape design. Position plants where their dramatic scale can create focal points or serve as living garden dividers. The silver-blue foliage color acts as a neutral element that complements nearly any color scheme, while the bold texture creates dynamic contrast with finer-textured plants.
Combine artichokes with flowering perennials that bloom when artichokes are in their vegetative stage to maintain continuous visual interest. Purple coneflowers, black-eyed Susans, and ornamental grasses make particularly effective companions, sharing similar growing requirements while providing complementary colors and textures. This thoughtful integration creates garden spaces that satisfy both practical harvest needs and aesthetic design principles.

Image from joegardener.com.
Using Artichokes in Edible Landscaping
Integrate artichokes into front yard landscapes as dramatic specimen plants that defy the typical vegetable garden aesthetic. Their architectural quality rivals many purely ornamental plants, while their edible production transforms ordinary landscapes into productive space. Place individual plants as focal points in perennial borders or group them in threes for dramatic mass plantings that anchor larger landscape areas.
Pollinator Benefits of Flowering Artichokes
Artichoke flowers provide abundant nectar and pollen resources that support numerous beneficial insect species, including honey bees, native bees, butterflies, and hummingbirds. These impressive blooms appear in late summer when many other garden flowers have faded, providing critical late-season resources for pollinators preparing for winter. The extended blooming period of sequential flowers on a single plant maximizes this ecological benefit throughout the late growing season.
Designating specific artichoke plants for ornamental flowering rather than bud harvest creates dedicated pollinator habitat within your productive garden space. This intentional sacrifice of some edible production for ecological benefit exemplifies the balanced approach of sustainable gardening. The increased beneficial insect activity attracted by flowering artichokes extends beyond these specific plants to improve pollination and pest management throughout your entire garden ecosystem!
From Garden to Table: Enjoying Your Harvest
Freshly harvested organic artichokes offer culinary possibilities that far exceed their store-bought counterparts in both flavor and texture! Their sweet, nutty character shines in simple preparations that highlight rather than mask their natural qualities. From traditional steaming to grilling and raw applications, home-grown artichokes adapt to countless cooking methods and flavor profiles.
Simple Storage Solutions for Fresh Artichokes
Fresh artichokes maintain optimal quality for 5-7 days when properly stored in the refrigerator. Lightly sprinkle unwashed buds with water, wrap them loosely in a damp paper towel, and store in a perforated plastic bag in the vegetable drawer. This method maintains humidity around the buds while allowing excess moisture to escape, preventing both dehydration and rot during storage.
Preserving Your Bumper Crop
Preserve excess artichokes by marinating quartered hearts in herb-infused olive oil for refrigerator storage lasting 2-3 weeks. For longer preservation, pressure can artichoke hearts in water or blanch and freeze them in sealed containers for up to 8 months. Dried artichoke petals make unique herbal teas with digestive benefits, while pickled hearts extend your enjoyment of the harvest throughout the year. Each preservation method highlights different aspects of the artichoke’s complex flavor profile, creating versatile ingredients for future culinary explorations!

Image from philosokitchen.com.
Frequently Asked Questions
Growing organic artichokes raises some common questions as gardeners navigate the unique characteristics of these distinctive plants. Understanding these frequently encountered challenges helps you anticipate and prevent potential issues before they impact your harvest.
How long does it take for artichokes to grow from seed to harvest?
Artichokes grown from seed typically require 85-100 days from transplanting to first harvest, with an additional 10-12 weeks of indoor growing time before transplanting. This timeline varies significantly based on growing conditions, with cool, moderate climates producing faster development than areas with temperature extremes. When grown as perennials, second-year and subsequent harvests begin much earlier in the growing season as plants emerge from dormancy with established root systems that support rapid spring growth.
Can I grow artichokes in containers or raised beds?
Artichokes can grow successfully in large containers (minimum 20-24 inches in diameter and depth) or raised beds that provide sufficient root space. Container growing requires more frequent watering and feeding to compensate for the restricted root zone, along with excellent drainage to prevent root rot. In cold-winter regions, container-grown artichokes offer the advantage of potential indoor overwintering in unheated garages or basements, extending the productive life of plants that might otherwise be treated as annuals.
Why are my artichoke buds small and tough?
Small, tough artichoke buds typically result from plant stress, particularly heat stress above 85°F (29°C) or inconsistent watering that creates drought conditions during bud development. Nutrient deficiencies, particularly insufficient nitrogen during the early growth phase or inadequate phosphorus during bud formation, also contribute to reduced size and quality. Improve outcomes by providing afternoon shade during hot periods, maintaining consistent soil moisture through mulching and regular irrigation, and following a balanced organic fertilization program throughout the growing season.
Do artichokes come back every year in all climates?
Artichokes reliably return as perennials in USDA hardiness zones 7-11 with minimal protection, while gardeners in zones 5-6 can maintain them as perennials with significant winter protection measures. In zones 2-4, most gardeners treat artichokes as annuals, starting new plants each season. Climate variations within zones, such as protected microclimates or unusually mild winters, sometimes allow perennial growth outside these general guidelines. Experiment with winter protection methods if you’re gardening near the edge of perennial viability, as successful overwintering significantly increases yields in subsequent seasons.
How do I know if my artichokes are truly organic?
Home-grown artichokes qualify as organic when grown without synthetic fertilizers, pesticides, herbicides, or genetically modified seed stock. Maintaining detailed garden records of all inputs and methods provides documentation of your organic growing practices if you’re planning to sell your chokes. For purchased plants or seeds, look for USDA Organic certification or OMRI (Organic Materials Review Institute) listed products to ensure they meet organic standards. Remember that true organic growing extends beyond simply avoiding chemicals to embrace holistic practices that build soil health and support balanced ecosystems around your plants.
Growing organic artichokes rewards gardeners with beautiful, productive plants that enhance both landscape aesthetics and culinary experiences. The combination of proper site selection, thoughtful variety choice, and consistent organic care creates the foundation for successful harvests year after year. As your artichoke plants mature, they become increasingly productive while requiring less intensive management—the ultimate goal of sustainable gardening.
By implementing the techniques and principles outlined in this guide, you’ll join countless gardeners who have discovered the satisfaction of growing these remarkable plants using methods that respect and enhance the natural environment. Your organic artichoke patch represents a perfect synthesis of beauty, flavor, and ecological harmony!
Featured Image from gilmour.com.


