Sustainable Gardening Guide: How to Grow Organic Radishes for a Quick Harvest

Discover effective methods for growing organic radishes for a quick harvest with our sustainable gardening guide, perfect for both beginners and seasoned gardeners.
Key Takeaways:
- Organic radishes are one of the fastest-growing crops you can plant, going from seed to harvest in as little as 25–35 days.
- Cool weather, loose compost-rich soil, and consistent moisture are the three non-negotiables for a successful organic radish crop.
- Succession planting every 10–14 days keeps fresh radishes coming for months — a simple trick most gardeners overlook.
- Too much nitrogen causes leafy tops with no roots — a common mistake covered in detail later in this guide.
- Every part of the radish plant is edible, from the crunchy root to the peppery greens, making it one of the most zero-waste crops in any organic garden.
If you only grow one crop this season, make it a radish — nothing else gives you a harvest this fast with this little effort, which is why they’re always in our spring and fall gardens!
Radishes are proof that organic gardening doesn’t have to be slow or complicated. Whether you’re working with a raised bed, a container on a balcony, or a full kitchen garden, organic radishes fit right in. They’re forgiving, foolproof, and endlessly rewarding — especially when you pull your first bunch just a few weeks after sowing!
This guide covers everything from selecting the right variety to fixing the most common problems, so you can grow radishes the organic way from day one.

Image from www.bhg.com.
What Makes Radishes Ideal for Organic Gardens
Radishes aren’t just fast — they’re genuinely useful in an organic garden system. They work with your soil, protect neighboring plants, and reduce waste because the entire plant is edible. For anyone building a sustainable growing space, they check nearly every box.
Most Radishes Mature in 25 to 35 Days
That speed is the headline feature, but it has practical implications beyond just impatience. A fast crop means you can fit multiple growing cycles into a single season. It also means mistakes are cheap — if a row fails, you can resow within the same week and still get a harvest. Most spring varieties like Cherry Belle and French Breakfast are ready to pull in 25–30 days, while larger daikon types (sometimes called “winter radishes”) take closer to 60 days.
The quick turnaround also makes radishes a reliable crop for succession planting. Sow a short row, wait 10 days, sow another — before long you have a continuous supply rather than one overwhelming glut!
They Double as a Natural Pest Deterrent
Radishes are widely used as a trap crop for flea beetles. These small, jumping insects are drawn to radish leaves and will target them over more valuable crops like brassicas and lettuces. Planting a border of organic radishes around your garden beds creates a natural buffer zone without any sprays or synthetic inputs. It’s one of the more elegant organic pest management strategies available, and it costs almost nothing.
Every Part of the Plant Is Edible
Plant Part How to Use It Flavor Profile Root Raw in salads, pickled, roasted Crisp, peppery, mildly spicy Greens (leaves) Sautéed, added to soups, stir-fried Peppery, can be slightly bitter Seed pods Eaten raw or pickled when plant bolts Mild, crunchy, radish-like Sprouts Salads, sandwiches, garnishes Delicate, fresh, lightly spicy
Most gardeners toss the tops without realizing they’re throwing away a perfectly good vegetable. Radish greens are rich in nutrients and taste wonderful when quickly sautéed in olive oil with garlic! If your radishes bolt in unexpected heat and shoot up flower stalks, don’t pull them — the seed pods that follow are crunchy, edible, and delicious pickled.
This zero-waste quality makes organic radishes especially aligned with sustainable gardening values. Nothing grown goes to waste, and every part of the plant earns its place in the kitchen.
The Best Radish Varieties to Grow Organically
Choosing the right variety makes a significant difference depending on your climate, season, and how you plan to use the harvest. Not all radishes behave the same way in the garden.
Spring Radishes for Fast Harvests
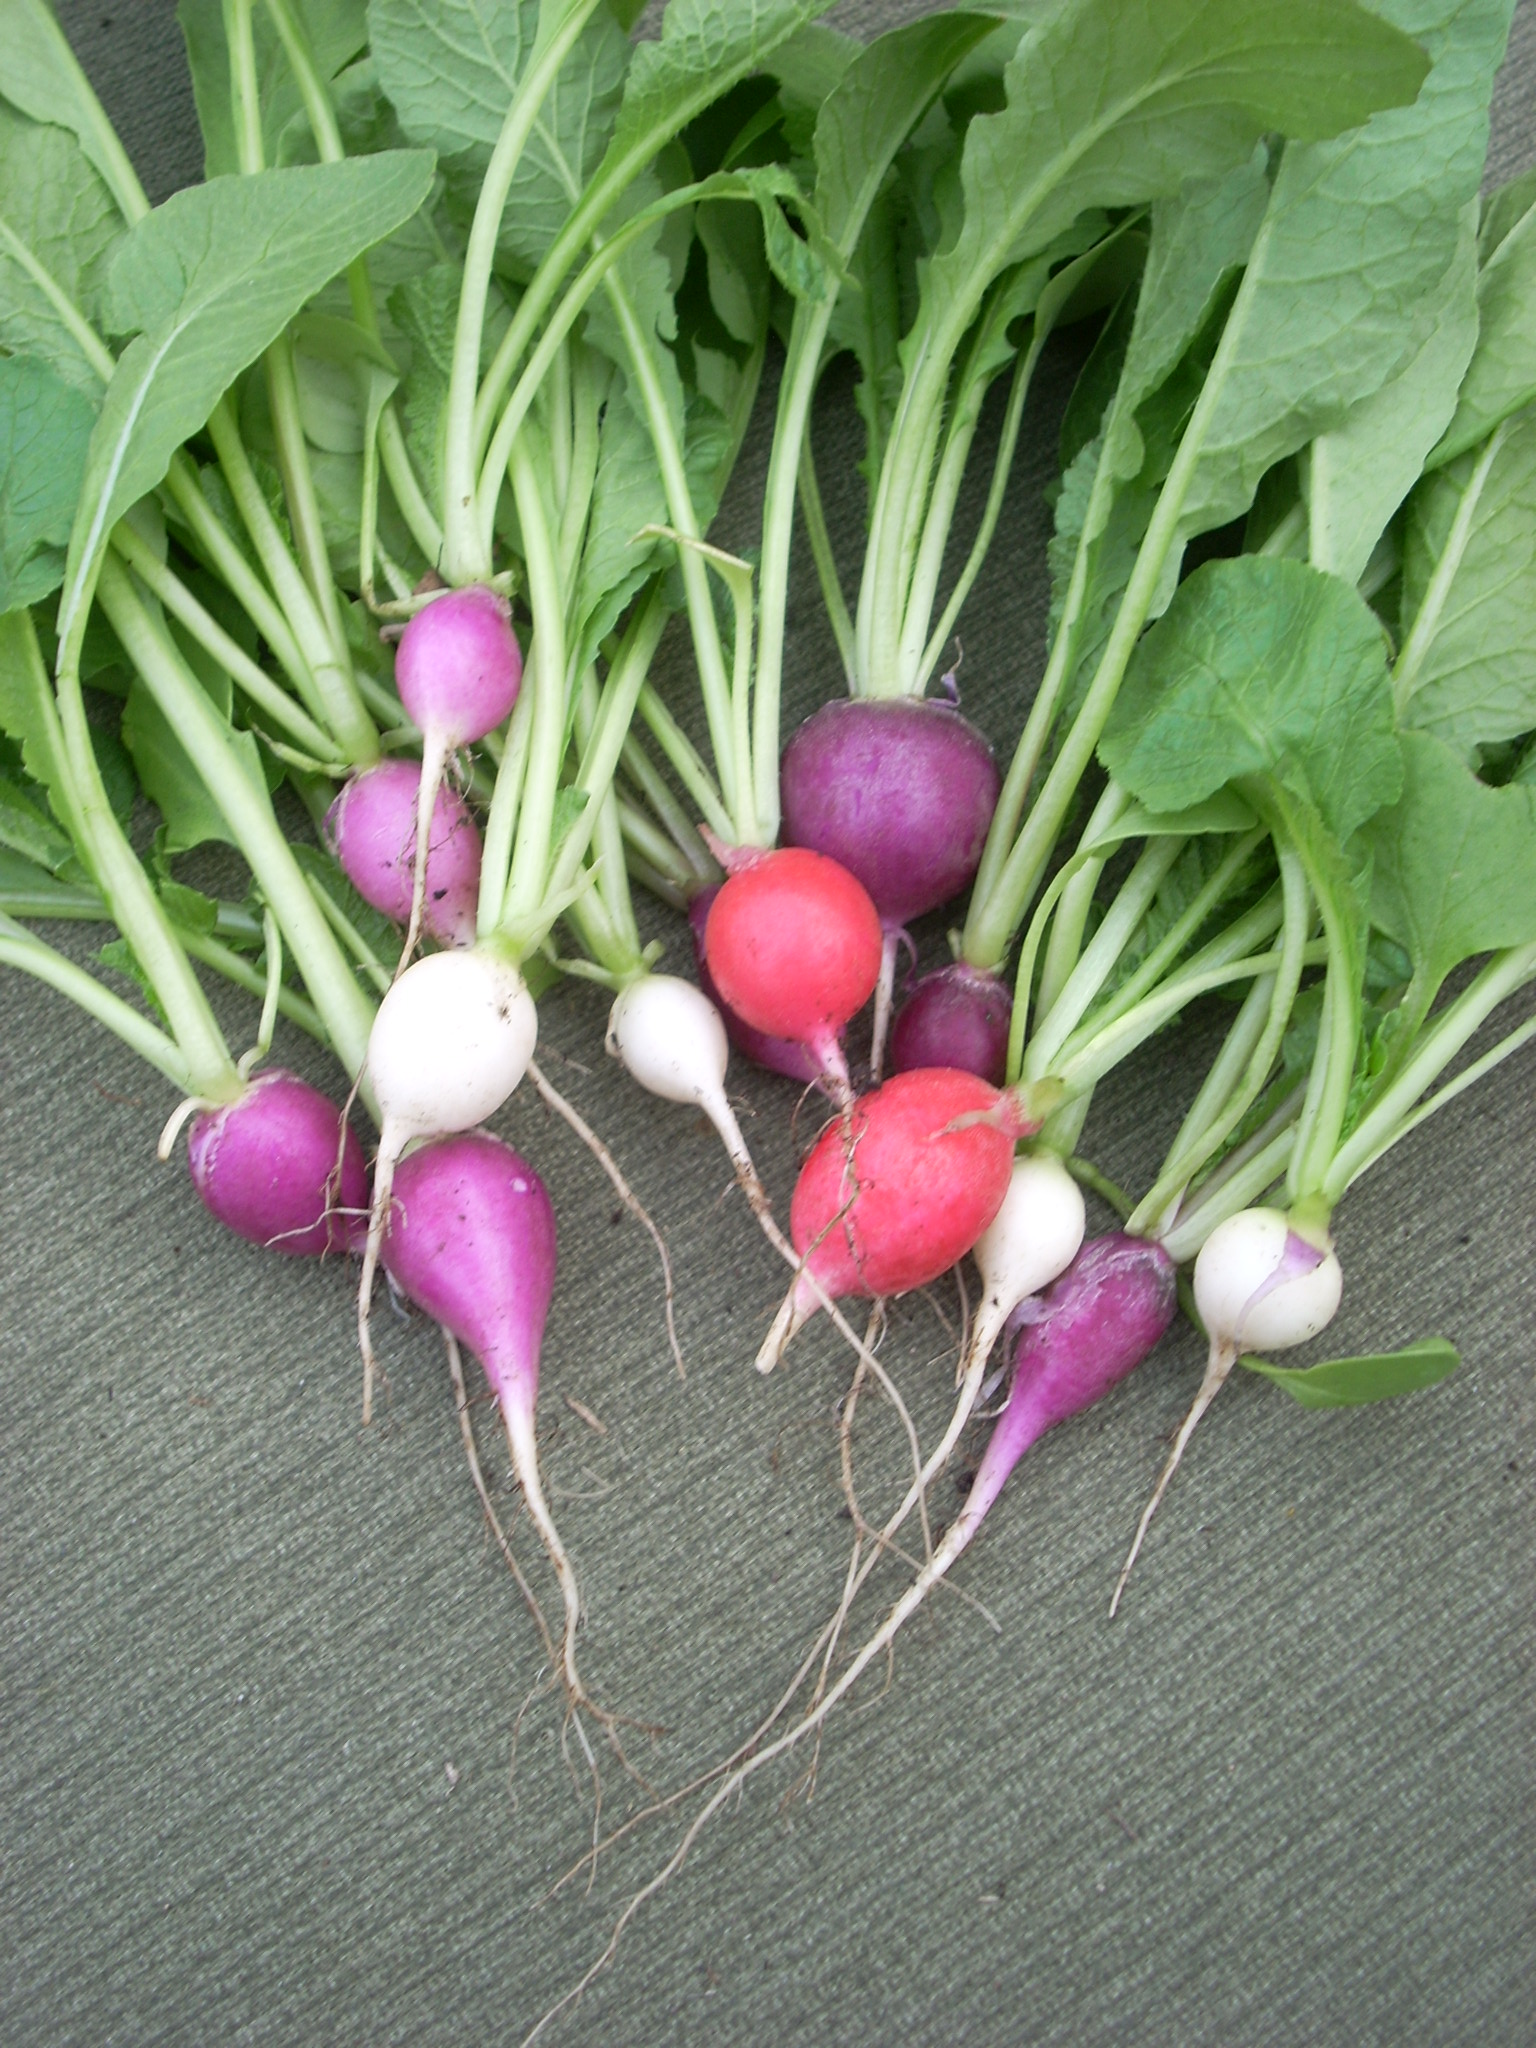
Image from en.wikipedia.org.
Spring radishes are small, round or oblong, and incredibly quick to mature. Cherry Belle is a classic — bright red, perfectly round, and ready in about 22–25 days. French Breakfast is an elongated variety with a milder flavor and a slightly longer maturity of around 28 days. Easter Egg is a colorful blend that produces roots in purple, red, white, and pink, making it a favorite for gardeners growing with kids! These varieties perform best when temperatures stay between 50°F and 65°F (10°C and 18°C).
Winter Radishes for Longer Growing Seasons

Image from www.finegardening.com.
Winter radishes grow larger, store longer, and tolerate cooler temperatures as they mature in fall. Daikon is the most well-known, producing long white roots that can reach 18 inches in length and take 50–70 days to mature. Watermelon Radish — also called Shinrimei — is another standout, with a green exterior that reveals a vivid pink-red interior. They’re sweet and spicy, juicy, crunchy, and they keep great stored in the refrigerator – we’ve enjoyed watermelon radishes all the way from November through the end of April! And Black Spanish is a striking variety with thick, black skin and a stark white, crisp, and spicy interior. These larger varieties are ideal for fermenting, roasting, or making the most of a fall garden bed that would otherwise sit empty.
Soil, Sun, and Setup Requirements
Get the growing conditions right, and organic radishes practically take care of themselves. Get them wrong — particularly the soil — and you’ll end up with spectacular leafy tops and almost no root to speak of.
Why Loose, Well-Draining Soil Matters for Root Development
Radish roots need to push downward through the soil with minimal resistance. Compacted or clay-heavy soil physically blocks that growth, resulting in stunted, misshapen, or forked roots – especially for elongated radish varieties. The goal is a fine, crumbly texture that allows roots to expand evenly in all directions.
- Break up clumps to a depth of at least 8–12 inches before sowing (less if you’re only growing small, round, spring varieties)
- Remove rocks, sticks, and debris that can cause forking
- Add a 1–2 inch layer of finished compost and rake it in before planting
- Avoid freshly manured beds — excess nitrogen pushes leaf growth at the root’s expense
- Check drainage by watering the bed and observing — water should absorb within a few minutes, not pool
Sandy loam is ideal for growing organic radishes, but most well-amended garden soils will work. If you’re dealing with heavy clay, raised beds filled with a compost-rich mix are your best option and will consistently outperform ground planting in difficult soil conditions.
How Much Sun Radishes Actually Need
- Full sun (6+ hours): Produces the fastest, most robust roots
- Partial shade (3–5 hours): Radishes will still grow but may take a few extra days to mature
- Deep shade (<3 hours): Not recommended — plants will prioritize leaf growth over root development
Radishes are one of the few root vegetables that tolerate partial shade reasonably well, which makes them useful for filling gaps between taller crops. In peak summer heat, a bit of afternoon shade can actually extend the growing window by keeping soil temperatures lower and slowing the bolting process.
Raised Beds vs. Ground Planting for Organic Radishes
Raised beds give you complete control over soil quality, drainage, and temperature — all three of which directly affect radish root development. A raised bed filled with a mix of topsoil, compost, and a little coarse sand creates exactly the loose, fast-draining environment radishes thrive in. You also warm up faster in spring, which means you can start sowing a week or two earlier than in-ground beds.
Ground planting works perfectly well in areas where the native soil is already loose and loamy. The key difference comes down to drainage. If your garden beds stay wet for hours (or days) after rain, radishes can rot before they mature. In that case, a raised bed isn’t just preferable — it’s the difference between a harvest and a failure. For container growing, choose a pot at least 6–8 inches deep and use a well-draining potting mix amended with compost.
How to Plant Organic Radishes Step by Step
Planting radishes is straightforward, but the details matter. The difference between a crisp, full-sized root and a spindly disappointment usually comes down to seed spacing, sowing depth, and timing — three things that take about two minutes to get right before you sow a single seed.
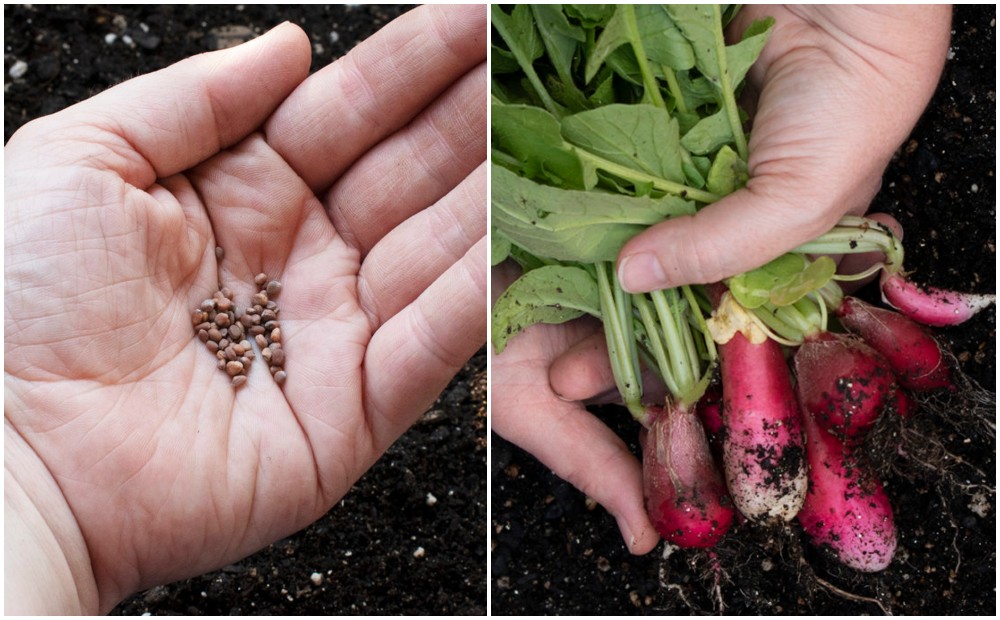
Image from www.ruralsprout.com.
Before you reach for the seed packet, make sure your bed is prepared, your timing aligns with cool weather, and you have a succession plan in place. Radishes reward a little forethought with almost embarrassingly good results! Here’s exactly what to do:
- Choose a cool-season planting window — soil temperatures between 45°F and 70°F (7°C to 21°C) are ideal
- Prepare the bed by removing debris, breaking up clumps, and raking the surface smooth
- Amend with a 1–2 inch layer of finished compost worked into the top 6 inches of soil
- Sow seeds directly — radishes do not transplant well and should always be direct sown
- Water immediately after sowing to initiate germination, which typically occurs within 3–5 days
- Thin seedlings to 2 inches apart once they reach about an inch tall — don’t skip this step
Thinning is the step most beginner gardeners resist because it feels counterproductive to pull up perfectly healthy seedlings. But overcrowded radishes compete for space underground and produce small, forked, or misshapen roots. Thin without hesitation, and you’ll be rewarded with round, smooth, full-sized roots every time.
1. Prepare the Soil With Compost Before Sowing
Finished compost is your most important input for organic radishes. Work a 1–2 inch layer into the top 6–8 inches of your bed before sowing. This improves soil structure, adds slow-release nutrients, and supports the microbial activity that makes those nutrients available to your plants. It also helps with moisture retention, which is critical for consistent germination.
Skip synthetic fertilizers entirely at this stage. Fresh or hot manure is equally problematic — too much available nitrogen at planting time pushes the plant’s energy into leaf development rather than root formation. Finished, well-aged compost provides a balanced nutritional profile that suits radishes perfectly without triggering excessive top growth. For more information on enhancing soil health, check out this complete guide to building soil health.
2. Sow Seeds at the Right Depth and Spacing
Sow radish seeds approximately ½ inch deep and space them about 1 inch apart in rows set 6–8 inches apart. Once seedlings emerge and reach about 1 inch tall, thin them to a final spacing of 2 inches between plants. (This can vary based on the variety – smaller varieties or elongated varieties like French Breakfast radishes can do fine at 1″ apart, whereas larger varieties like the Watermelon Radish might need an extra 1/2 inch.) This spacing gives each root enough room to develop fully without competition. Sowing too deep delays germination; sowing too shallow can result in seeds drying out before they sprout.
3. Time Your Planting to Cool Weather Windows
Radishes are a cool-season crop and genuinely struggle when temperatures push above 75°F (24°C). In spring, sow as soon as the soil can be worked — typically 4–6 weeks before your last frost date. For fall, count backward 4–6 weeks from your first expected frost date and sow then. Avoiding the peak of summer heat is essential. Hot soil causes radishes to bolt — sending up a flower stalk instead of developing a root — which ends the harvest before it begins.
4. Use Succession Planting Every 10 to 14 Days
Rather than sowing an entire packet at once and ending up with 40 radishes ready on the same Tuesday, stagger your plantings. Sow a short row or a small section of your bed every 10–14 days throughout spring and again in early fall. This simple rhythm ensures you have fresh organic radishes ready to pull continuously across the season rather than in a single overwhelming flush. For more tips on planning your garden, check out this portion-based garden planning video.
Organic Feeding and Watering Without Synthetic Inputs
Radishes grow so quickly that they have very little time to benefit from heavy feeding programs. The bulk of their nutritional needs are met by well-prepared soil at planting time. What matters most after sowing is consistent moisture — that one factor has more impact on radish quality than any fertilizer you could apply.
Why Compost Is Enough for Fast-Growing Organic Radishes
Because radishes move from seed to harvest in under five weeks, they don’t have time to draw down heavy reserves of fertilizer. A single layer of finished compost worked in before sowing provides everything they need — phosphorus for root development, potassium for cellular strength, and trace minerals that support flavor and crunch. There’s rarely a reason to add anything else.
For watering, aim to keep the soil consistently moist but never waterlogged. Irregular watering — dry spells followed by heavy soaking — causes radish roots to crack and split. A steady, even moisture level from germination through harvest is the single most effective thing you can do to guarantee smooth, crisp roots. Mulching around seedlings with straw or shredded leaves helps retain that moisture between waterings and keeps soil temperatures stable.
The Risk of Too Much Nitrogen on Root Crops
Nitrogen encourages leafy, vegetative growth — which is exactly what you don’t want when you’re trying to grow a root. Too much available nitrogen in the soil at planting time redirects the plant’s energy upward into foliage rather than downward into root development. The result is a radish plant with lush, impressive leaves and a tiny, underdeveloped root that’s barely worth pulling!
Organic Input Nitrogen Level Safe for Radishes? Best Use Finished compost Low to moderate ✓ Yes Pre-plant amendment Fresh manure Very high ✗ No Use on heavy feeders only Blood meal Very high ✗ No Avoid for root crops Aged manure Moderate △ Use sparingly Mix lightly into compost Worm castings Low, balanced ✓ Yes Mix into soil or top-dress
Worm castings are arguably the best supplemental organic input for organic radishes when your compost supply is limited. They provide a gentle, balanced nutrient profile with no nitrogen spike, and they also introduce beneficial microorganisms that improve soil structure over time. A small handful worked into each planting row is more than sufficient.
If your radishes consistently produce great tops but poor roots despite correct spacing and timing, nitrogen is almost always the culprit. Review what you’ve added to the bed in the past season — even leftover inputs from a previous heavy-feeding crop like corn or squash can leave residual nitrogen levels high enough to throw off a subsequent radish planting.
How and When to Harvest Radishes
Timing the harvest correctly is just as important as everything that comes before it. Radishes have a narrow window of peak quality — pull them too early and they lack flavor; leave them too long, and they turn pithy, woody, and bitter almost overnight.

Image from www.gardenary.com.
Signs Your Organic Radishes Are Ready to Pull
- The tops of the roots are visibly pushing up out of the soil surface
- You can see the root’s color — red, white, or purple — at or just above soil level
- The root shoulder feels firm, not soft, when gently pressed
- The root has reached the expected size for the variety (typically ¾ inch to 1 inch in diameter for spring types)
- Days-to-maturity listed on the seed packet have passed — use this as your starting point for checking
To harvest, grip the greens close to the root and pull straight up with a firm, steady motion. In loose soil, they’ll come out cleanly. In denser soil or for longer radishes like daikon, you may need to loosen the ground around the root with a hand fork before pulling to avoid snapping the top away from the root.
Once harvested, twist off the greens immediately if you’re not eating them the same day. Leaving the tops attached draws moisture out of the root and causes it to go limp and rubbery much faster. Store the roots in a sealed bag or container in the refrigerator, where they’ll stay crisp for up to two weeks. The greens should be used within two to three days — sauté them quickly with garlic and olive oil, or add them to a simple broth for a tasty and nutritious source of vitamins!
Don’t wait for every radish in a row to reach the perfect size before pulling any of them. Harvest the largest roots first and let the smaller ones continue developing for a few more days. This selective approach maximizes your yield and prevents any single root from going over and turning bitter while you wait for the rest to catch up.
Why Delayed Harvesting Leads to Woody or Bitter Roots
Radishes don’t hold at peak quality the way carrots or beets do. Once they hit maturity, the clock starts ticking fast. Left in the ground too long — even just a week past their prime — spring radish varieties can become pithy and hollow in the center, with a sharp, unpleasant bitterness that no amount of salad dressing can fix. In warm weather, that window narrows even further. A radish that’s perfect on Monday can be inedible by Friday if temperatures spike, so keep an eye on your radishes as they start to size up, and harvest promptly. (Winter radishes are more hardy and can be left in the ground longer, although if they are allowed to overwinter in warmer climates, they may bolt quickly in the spring.)
Common Radish Problems and Organic Fixes
Even the easiest crop in the garden occasionally runs into trouble. The good news is that most radish problems have a clear cause and a straightforward organic solution. The even better news is that because radishes grow so quickly, you can identify a problem, fix it, resow, and still get a full harvest within the same season — sometimes within the same month!
The most common issues are flea beetle damage, poor root formation, bolting in unexpected heat, and cracked or split roots from inconsistent watering. Most of these are preventable with the right setup, but knowing how to respond when they appear is just as valuable.
Flea Beetles and How Radishes Trap Them Away From Other Crops
Flea beetles are small, shiny, jumping insects that chew tiny holes through radish leaves, giving them a shot-hole appearance. While the damage looks alarming, it rarely kills the plant or affects the root below ground. What makes this pest situation genuinely interesting from an organic gardening perspective is that radishes can be used intentionally as a trap crop to lure flea beetles away from more vulnerable plants like kale, arugula, broccoli, and eggplant.
To use radishes as a trap crop, plant a border row or sacrificial patch near your more valuable brassicas before or at the same time as the main crop. The flea beetles will colonize the organic radishes first, concentrating their population in one place. Once heavily infested, you can remove and destroy the trap crop plants — beetles and all — or treat that specific area with an organic-approved spray like spinosad or a light application of diatomaceous earth along the leaf surfaces. Either way, your main crops stay protected without a single synthetic chemical involved.
Poor Root Formation Caused by Dense or Compacted Soil
If you’re consistently pulling up organic radishes with forked, stunted, or strangely shaped roots, the soil is almost always to blame. Compaction, rocks, clumps of unbroken clay, or even large pieces of partially decomposed organic matter create physical obstacles that force the developing root to grow around them. The fix is to dig deeper and more thoroughly before your next sowing — break up the bed to several inches (10-12 inches for large or deep-rooted varieties; 4-6 inches for smaller types), remove any debris, and work in finished compost to loosen the texture. In persistent clay soils, switching to a raised bed with purpose-built growing mix will resolve the problem permanently.

Start Planting Organic Radishes This Season and Eat Within the Month
There is no other crop I’m aware of (other than perhaps microgreens) that moves this fast from bare soil to table. Within 25 days of sowing, you can be crunching on organic radishes you grew yourself — without synthetic inputs, and with very little effort beyond what’s already been laid out in this guide. That’s a genuinely remarkable return on a packet of seeds that costs less than a cup of coffee!
The framework is simple: start with loose, compost-amended soil, sow in cool weather, water consistently, thin to 2 inches apart, and harvest the moment the roots show themselves at the soil surface. Layer in succession planting every 10–14 days and you’ll have a continuous supply rolling through spring and again in fall — two of the best seasons to be in the garden anyway!
If you take nothing else from this guide, take this: organic radishes reward action. They don’t need perfect conditions, elaborate setups, or expensive inputs. They need cool weather, decent soil, and someone willing to actually plant them. Everything after that is remarkably forgiving. Here’s a quick summary of everything you need to get started:
Growing Factor Recommendation Soil Type Loose, well-draining, compost-amended loam Sowing Depth ½ inch deep, 1 inch apart, thinned to 2 inches Row Spacing 6–8 inches between rows Best Planting Temp 45°F–70°F (7°C–21°C) Days to Maturity 25–35 days (spring); 50–70 days (winter varieties) Watering Consistent moisture; avoid wet-dry extremes Feeding Finished compost at planting; no additional feeding needed Succession Planting Every 10–14 days through spring and fall Harvest Signal Root shoulder visible at soil surface; firm to the touch
Print that table, pin it to your garden shed wall, and you have everything you need to grow great organic radishes all season long. Start with a single short row this week — just six feet will give you enough radishes to fill a salad bowl — and see how quickly the process becomes second nature.
Frequently Asked Questions
These are the questions that come up most often from gardeners trying organic radishes for the first time, and a few that even experienced growers occasionally need a refresher on.
Most of the answers come back to the same core principles — cool temperatures, good soil, consistent water, and not waiting too long to harvest. But the specifics matter, so here are the straight answers.
Can You Grow Organic Radishes in Containers or Pots?
Yes! Radishes grow very well in containers. Choose a pot or trough that is at least 6–8 inches deep for small round varieties like Cherry Belle. Larger varieties like daikon will need a container at least 12–15 inches deep to accommodate their longer root. Fill with a well-draining potting mix amended with finished compost, and make sure the container has drainage holes — waterlogged soil causes rot.
Container-grown organic radishes dry out faster than in-ground beds, so check moisture levels daily during warm spells. A layer of fine mulch on the surface helps retain moisture between waterings. Beyond that, the same rules apply: sow in cool weather, thin to 2 inches apart, and harvest as soon as roots are ready.
Why Are My Radishes All Leaves and No Roots?
This is one of the most common complaints from new organic radish growers, and it almost always comes down to one of three causes: too much nitrogen in the soil, overcrowding from skipped thinning, or planting during warm weather that triggers the plant to bolt instead of forming roots. Identify which factor applies to your situation, and you’ll have the answer.
The table below breaks down the most likely cause based on what you’re seeing in the garden:
What You’re Seeing Most Likely Cause Organic Fix Lush tops, tiny roots across the whole bed Excess nitrogen in soil Avoid fresh manure; use only finished compost next sowing Tall, spindly plants, no root bulge Overcrowding (not thinned) Thin to 2 inches apart immediately after germination Plants flowering without forming roots Warm temperatures causing bolting Shift planting to cooler seasons; try a shadier spot in summer Forked or misshapen roots Compacted or rocky soil Loosen bed to 12 inches; remove debris; switch to raised bed
If all three conditions are present at once — nitrogen-rich soil, crowded seedlings, and warm weather — even a quick-maturing variety like Cherry Belle won’t produce usable roots. Reset the bed, adjust the timing, and start fresh. Given how fast radishes grow, you can be back on track within two weeks.
Can You Grow Radishes Organically Without a Compost Pile?
Yes, absolutely. While finished compost is the ideal amendment for organic radishes, there are several other organic alternatives that work well. Worm castings are the most direct substitute — mix a generous handful into each planting row before sowing. They provide a balanced, low-nitrogen nutrient profile that suits root crops perfectly. Leaf mold (decomposed leaves) is another excellent option that improves soil structure and moisture retention without the nitrogen spike risk.
If neither is available, focus on soil loosening and texture above all else. A radish in well-loosened native soil with no amendments will still outperform one in compacted, nutrient-rich soil. Nutrients matter less than structure for this particular crop. Once you have a harvest or two under your belt, consider starting a simple compost bin — even a small one — to build a long-term supply of the best possible organic amendment for your whole garden, not just your radishes.
What Is the Best Season to Plant Organic Radishes?
Spring and fall are the two ideal seasons for radishes. In spring, sow 4–6 weeks before your last frost date when soil temperatures are between 45°F and 70°F (7°C and 21°C). In fall, count back 4–6 weeks from your first expected frost and sow then. Avoid peak summer — sustained heat above 75°F (24°C) causes bolting and poor root development in almost every spring variety. In mild climates, radishes can also be grown through winter with a light row cover for frost protection.
How Do You Store Freshly Harvested Organic Radishes?
As soon as you pull radishes from the ground, twist off the greens at the base. Leaving the tops attached draws moisture out of the root rapidly, causing it to go limp and lose its signature crunch within a day or two. The roots store best in the refrigerator, placed in a sealed zip-lock bag or airtight container with a slightly damp paper towel to maintain humidity. Stored this way, they’ll stay crisp and flavorful for up to two weeks.
The greens are highly perishable and should be used within two to three days of harvest. Rinse them thoroughly — they tend to trap soil in the leaf folds — and sauté them simply in olive oil and garlic, add them to a vegetable broth, or blend them into a green smoothie. Don’t discard them; they’re genuinely nutritious and far better than anything you’d buy at a market!
Featured Image from cleangreensimple.com.

Related Posts
-
 Organic Eggplant Growing Guide: Sustainable Gardening Tips for Aubergine Success
- Sustainable Gardening Guide: How to Grow Organic Garlic At Home
- The Perennial Garden: 10 Tasty Fruits & Vegetables To Try
- [Video] How to Grow Garlic In Containers
- Compost Tea: How to Make This Garden Elixir
- Organic Carrot Growing Guide: Sustainable Gardening Techniques & Tips


