Vacuum Sealing Fresh Vegetables: Best Storage Tips & Tricks

Vacuum sealing fresh vegetables can make your summer harvest last longer & provide easy, homegrown meals for later use. Here are some tips for success…
Key Takeaways:
- Vacuum sealing extends vegetable freshness by 3-5 times longer than conventional storage methods, keeping them fresh for 1-2 weeks in the refrigerator and up to 3 years in the freezer.
- Blanching vegetables before vacuum sealing is crucial for maintaining flavor, color, texture, and nutritional value, especially for cruciferous vegetables.
- Proper preparation techniques including thorough drying and pre-freezing moist vegetables can dramatically improve vacuum sealing results and prevent seal failures.
- Not all vegetables respond the same way to vacuum sealing – some require special handling while others like root vegetables are naturally better suited for this preservation method.
Vacuum sealing vegetables is a game-changer for anyone looking to reduce food waste and save money. By removing air from storage containers, you dramatically slow down the deterioration process, preserving freshness, flavor, and nutrients for significantly longer periods. Whether you’re dealing with a garden surplus, taking advantage of farmers market deals, or simply trying to extend the life of your produce, mastering this technique can transform how you store food.

Image from cooklikechuck.com.
Why Vacuum Sealing Vegetables Will Transform Your Food Storage
Food waste is a massive problem in modern households. The average family throws away about 30% of the food they purchase, with fresh produce being the most commonly discarded item. Vacuum sealing offers a practical solution that can extend the shelf life of vegetables by 3-5 times compared to conventional storage methods. This preservation technique removes oxygen that normally fuels bacterial growth and enzymatic reactions that cause vegetables to deteriorate. When properly sealed and stored, your vegetables maintain their peak freshness, flavor, and nutritional value much longer than traditional storage methods.
Beyond reducing waste, vacuum sealing creates a more organized kitchen system. Pre-portioned vegetables are ready to use whenever needed, eliminating the frustration of finding slimy forgotten produce in the back of your refrigerator!OutOfAir notes that this organization system makes meal planning more efficient and helps households maintain a steady supply of healthy vegetables year-round, regardless of seasonal availability or garden harvest schedules.
How Vacuum Sealing Extends Vegetable Shelf Life
Understanding the science behind food deterioration helps explain why vacuum sealing is so effective. Fresh vegetables continue living after harvest, respiring and releasing gases while naturally occurring enzymes break down cell walls. Meanwhile, ambient bacteria and molds begin their decomposition work on the surface. These processes require oxygen to function efficiently – remove that oxygen, and you dramatically slow the deterioration timeline.
The Science Behind Air Removal and Preservation
Vacuum sealing creates a hostile environment for aerobic bacteria and molds that cause spoilage. These microorganisms need oxygen to multiply rapidly – without it, their growth is severely restricted. Additionally, the physical barrier of the vacuum seal prevents cross-contamination and blocks moisture loss that leads to dehydration and textural changes. Most importantly, sealing vegetables reduces oxidation reactions that destroy nutrients and alter flavors over time.
The vacuum process also minimizes freezer burn when storing vegetables long-term in the freezer. Freezer burn occurs when air contacts frozen food, causing moisture to evaporate from the food surface and resulting in dry, discolored patches. By removing nearly all air before freezing, vacuum sealed vegetables can maintain their quality much longer, avoiding the disappointing texture and flavor deterioration that commonly affects frozen foods.
Comparing Storage Times: Regular vs. Vacuum Sealed
The difference in storage longevity between conventional methods and vacuum sealing is remarkable. For refrigerated storage, most vegetables typically last 1-3 days in standard packaging, while vacuum sealed vegetables remain fresh for 1-2 weeks. The contrast becomes even more dramatic when freezing: green beans last approximately 8 months in conventional freezer storage but extend to an impressive 2-3 years when properly vacuum sealed.
Vegetable Storage Comparison: Regular vs. Vacuum Sealed
Carrots: 2-3 weeks (regular) vs. 2-3 months (vacuum sealed, refrigerated)
Spinach: 3-5 days (regular) vs. 1-2 weeks (vacuum sealed, refrigerated)
Corn: 8-12 months (regular, frozen) vs. 2-3 years (vacuum sealed, frozen)
Broccoli: 3-5 days (regular) vs. up to 2 weeks (vacuum sealed, refrigerated)
Bell Peppers: 1 week (regular) vs. 2-3 weeks (vacuum sealed, refrigerated)
These extended timelines aren’t just theoretical – they represent real-world results observed by home food preservationists. The key factor is proper preparation combined with correct storage temperatures. Refrigerated vacuum sealed vegetables should be kept at 34-38°F for optimal results, while frozen items need consistent temperatures of 0°F or below to maintain quality throughout their extended storage life.
Essential Equipment for Vacuum Sealing Vegetables
Investing in the right equipment makes all the difference in vacuum sealing success. The market offers various options at different price points, but certain features are essential for effectively preserving vegetables. At minimum, you’ll need a reliable vacuum sealer machine and compatible bags or containers designed specifically for food preservation.

Image from www.amazon.com.
Types of Vacuum Sealers Worth Your Money
Two main types of vacuum sealers dominate the market: external sealers and chamber sealers. External vacuum sealers are the most common for home use, typically priced between $60-200, and work by suctioning air from specially designed bags before heat-sealing them. Chamber vacuum sealers, priced from $300-1000+, place the entire bag inside a chamber where air pressure is equalized and removed, making them ideal for high-volume sealing and moist foods. For most home vegetable preservation, a quality external sealer with adjustable vacuum strength and sealing time will provide excellent results.
Choosing the Right Bags and Containers
Bag quality directly impacts preservation success. Look for BPA-free bags with textured channels that help extract air efficiently. Thickness matters—bags rated at 3-4 mil provide durability for freezer storage and resist punctures from firm vegetables or sharp edges. Pre-cut bags offer convenience while bag rolls allow custom sizing for different vegetables and portion needs. For frequent users, investing in commercial-grade bags pays off with more reliable seals and better longevity.
Beyond bags, consider specialized containers for delicate items. Vacuum-sealable containers work exceptionally well for berries, pre-cut leafy greens, and crushed herbs that might be damaged in standard bags. Many vacuum sealer brands offer compatible containers with valve attachments that connect to your sealer for air extraction.
Budget-Friendly Options for Beginners
If you’re just starting out, several affordable options provide good performance without breaking the bank. Handheld vacuum sealers paired with zippered bags offer an entry point under $30, though they typically provide a weaker vacuum and shorter storage life. Starter external sealer kits in the $50-$100 range from brands like FoodSaver or Nesco include the essential equipment and bags to begin preserving vegetables immediately. As your skills develop and preservation needs increase, you can upgrade to models with enhanced features while still using your starter model for simpler tasks.
Preparing Vegetables Before Vacuum Sealing
Proper preparation is the critical difference between mediocre and outstanding results when vacuum sealing vegetables. Each step—from initial cleaning to final packaging—impacts storage quality and longevity. Taking time to prepare vegetables correctly before sealing will reward you with better flavor, texture, and nutrition when you finally use them. For those interested in maximizing their garden yield, exploring these methods to preserve zucchini and summer squash can be a great addition to your preservation techniques.

Image from www.mamasezz.com.
Washing and Drying: The Critical First Steps
Begin by thoroughly washing vegetables to remove dirt, pesticide residues, and surface microorganisms. For root vegetables, use a vegetable brush to clean crevices where soil may hide. Leafy greens should be submerged and agitated in cold water to dislodge grit between leaves. After washing, the drying step becomes absolutely crucial—any excess moisture left on vegetables can interfere with seal quality and potentially lead to spoilage. Pat vegetables dry with clean kitchen towels, then allow additional air-drying time for naturally moist vegetables. A salad spinner works wonders for removing water from leafy greens before vacuum sealing.
Blanching Vegetables: Why It Matters
Blanching—briefly immersing vegetables in boiling water followed by an ice bath—is a non-negotiable step for most vegetables destined for freezer storage. This quick heat treatment deactivates enzymes that would otherwise cause flavor deterioration, color changes, and nutrient loss during storage. It also brightens color, helps retain vitamins, and kills surface microorganisms that could cause spoilage. Different vegetables require specific blanching times: for example, 2-3 minutes for green beans, 1 minute for sliced carrots, and 2 minutes for broccoli florets are standard guidelines.
After blanching, vegetables must be thoroughly cooled and dried before vacuum sealing. Spread them in a single layer on towel-lined baking sheets and allow them to air-dry, or pat them gently with towels. Any remaining surface moisture can create ice crystals during freezing and potentially compromise your vacuum seal. For more detailed information on preserving freshness, check out this guide to vacuum sealing vegetables.
Pre-Freezing Technique for Moist Vegetables
Vegetables with high moisture content—like tomatoes and zucchini, and fruit such as berries—benefit from pre-freezing before vacuum sealing. Arrange prepared pieces in a single layer on a parchment-lined baking sheet and freeze until solid (usually 1-2 hours). This step prevents these vegetables from being crushed during the vacuum process and stops excess moisture from being drawn out and interfering with the seal. Pre-freezing also prevents pieces from clumping together, allowing you to remove only what you need when cooking later.

Image from designmom.com.
Cutting and Portioning for Convenience
Strategic cutting and portioning transforms vacuum sealing from mere preservation to meal preparation. Cut vegetables into ready-to-use pieces that match your cooking habits—julienned carrots for stir-fries, diced onions for soups, or potato slices for gratins. Package vegetables in meal-sized portions that align with your typical recipes rather than large batches that must be completely thawed for a single use. For mixed vegetables destined for specific dishes, consider creating ready-to-cook kits with appropriate vegetables already combined in ideal proportions.
Best Vegetables for Vacuum Sealing
Not all vegetables respond equally to vacuum sealing. Understanding which varieties perform best helps you focus your preservation efforts where they’ll yield the greatest benefits. The vegetable’s structure, moisture content, and enzymatic activity all influence how well it maintains quality under vacuum conditions. While almost any vegetable can be vacuum sealed with proper preparation, some are naturally better suited to this preservation method than others. For example, if you’re interested in preserving sweet corn, you might find this this preservation guide helpful for ensuring the best quality.
Root Vegetables: Carrots, Beets, and Potatoes
Root vegetables consistently rank among the best candidates for vacuum sealing due to their dense structure and relatively low moisture content. Carrots maintain their bright color and crisp texture exceptionally well when blanched, cooled, dried, and vacuum sealed. Beets preserve their intense color and earthy sweetness, though they should be fully cooked before sealing to prevent staining and texture issues. Potatoes require blanching to prevent discoloration, and they benefit from being stored in water-resistant vacuum bags to maintain quality during freezer storage.
For extended refrigerator storage of raw root vegetables, vacuum sealing without blanching can still extend shelf life significantly—from weeks to months in some cases. This technique works particularly well for winter storage varieties of root vegetables that naturally contain fewer enzymes that cause spoilage.
Cruciferous Vegetables: Special Handling Required
Broccoli, cauliflower, brussels sprouts, and cabbage present unique challenges for vacuum sealing due to their gas-emitting properties. These cruciferous vegetables continue to release gases even after harvest, which can inflate bags and break seals if not properly handled. Blanching is absolutely essential for these vegetables before vacuum sealing—not only for enzyme deactivation but also to halt the gas-releasing processes.
The blanching times for cruciferous vegetables vary: 2 minutes for broccoli florets, 3 minutes for cauliflower, 3-4 minutes for brussels sprouts, and 1.5 minutes for shredded cabbage. After blanching and thorough cooling, these vegetables benefit from the pre-freezing technique before vacuum sealing to prevent crushing their delicate structures.
When properly prepared, cruciferous vegetables maintain their nutritional value remarkably well in vacuum-sealed storage. Their cancer-fighting compounds and high vitamin C content remain largely intact, making them valuable additions to your preserved vegetable collection.

Image from www.foodstoragemoms.com.
Leafy Greens and Herbs: Preventing Crushing
The delicate nature of leafy greens and herbs makes them challenging candidates for vacuum sealing, but specialized techniques yield excellent results. For sturdy greens like kale and collards, blanching for 1-2 minutes before cooling, drying, and vacuum sealing works well. More delicate greens like spinach and lettuce benefit from a gentler approach—use the pulse function on your vacuum sealer to remove most air without completely crushing the leaves, or consider using vacuum containers rather than bags.
Fresh herbs preserve remarkably well when vacuum sealed using specialized methods. For soft herbs like basil, cilantro, and parsley, consider pureeing with a small amount of oil and freezing in ice cube trays before vacuum sealing the frozen cubes. Alternatively, dry herbs completely before vacuum sealing in small portions for pantry storage—this extends their aromatic quality from months to years compared to conventional storage methods.
Step-by-Step Vacuum Sealing Process
Following a systematic approach to vacuum sealing vegetables ensures consistent results and maximum storage life. The process requires attention to detail at each stage, from bag selection through final storage. Taking time to master these steps pays dividends in food quality and reduced waste over the long term. The initial investment in careful technique quickly becomes second nature with practice.
Perfect Bag Placement and Spacing
Proper bag positioning is vital for successful vacuum sealing. Always leave at least 3 inches of space between the vegetables and the open end of the bag to ensure a strong, complete seal. This extra space allows the sealer to create an uncontaminated seal area without food particles or moisture interfering. For vegetables with sharp edges like carrots or celery stalks, consider positioning them parallel to each other rather than haphazardly to prevent bag punctures and failed seals.
When placing vegetables in the bag, arrange them in a single layer rather than piling them on top of each other. This flat arrangement allows for more efficient air removal and creates packages that stack neatly in your freezer or refrigerator. For larger quantities, it’s better to use multiple smaller bags than to overstuff a single large one, as this improves both the sealing process and later thawing efficiency.
Setting the Right Vacuum Level
Many quality vacuum sealers offer adjustable vacuum strength settings, which prove invaluable when working with different vegetables. Delicate items like leafy greens benefit from a gentle vacuum using the pulse function, which gives you control over the process and prevents crushing. Firmer vegetables like carrots and potatoes can withstand maximum vacuum strength, which removes more air and extends their storage life. If your machine lacks adjustable settings, you can manually control the process by pressing the seal button before the vacuum becomes too intense for delicate items.
For vegetables with high moisture content, use the “moist” setting if your machine offers it. This feature extends the sealing time to ensure a complete bond despite any moisture that might be present. When working with pre-frozen vegetables, the “normal” or “dry” setting usually works best as surface moisture has already been transformed into ice crystals.
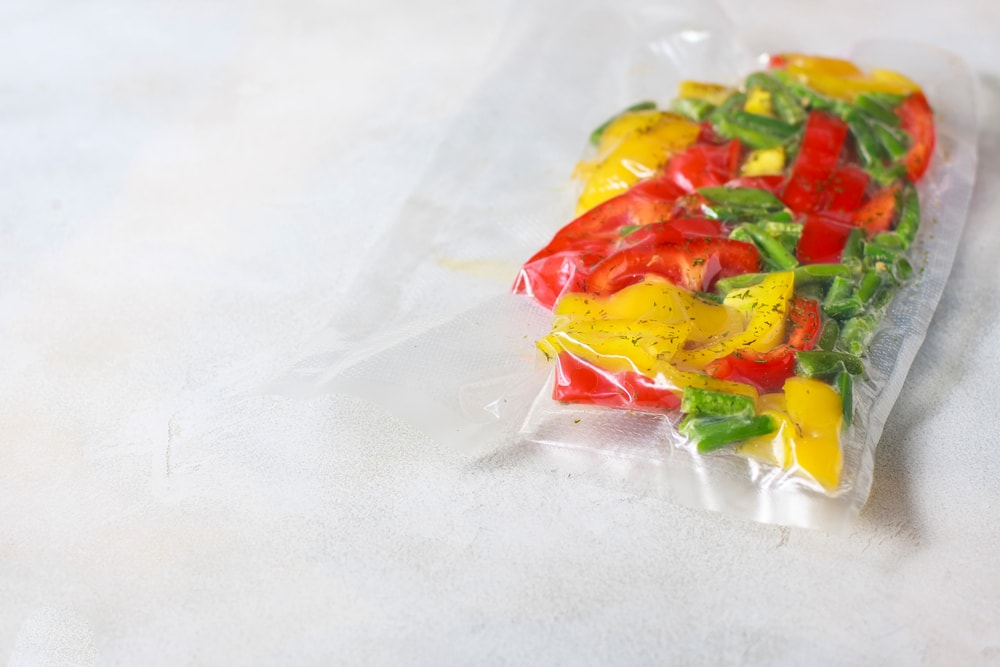
Image from www.crazyvegankitchen.com.
Checking for Complete Seals
Never skip the crucial step of inspecting your seals before storage. A proper seal appears as a smooth, continuous line across the entire width of the bag without wrinkles, channels, or gaps. Hold the sealed bag up to light to check for inconsistencies or incomplete sections. Gently tug the seal to verify its strength—there should be no separation when moderate pressure is applied.
If you discover an incomplete seal, simply trim off the sealed portion and repeat the sealing process. It’s far better to address seal issues immediately than to discover spoiled vegetables weeks later. For extra security with particularly valuable harvests or long-term storage items, consider double-sealing by adding a second seal line about ¼ inch away from the first one.
Storage Locations for Vacuum Sealed Vegetables
Where you store your vacuum-sealed vegetables significantly impacts their longevity and quality. Different vegetables have optimal storage conditions, and understanding these requirements helps maximize preservation benefits. The three main storage options—refrigerator, freezer, and pantry—each serve different preservation purposes and timeframes.
Refrigerator Storage Guidelines
Refrigerator storage works exceptionally well for vegetables you plan to use within 1-2 weeks. Store vacuum-sealed packages in the crisper drawer where temperatures remain most consistent, ideally between 34-38°F. Label each package with contents and sealing date to maintain proper rotation. Separate different vegetables to prevent potential ethylene cross-effects—some vegetables release this ripening gas even through sealed packages.
For maximum freshness, avoid storing vacuum-sealed vegetables near the refrigerator door where temperature fluctuations occur with each opening. The back of the refrigerator typically maintains the most consistent temperature. Monitor your refrigerator’s temperature periodically with a separate thermometer to ensure it’s operating in the optimal range for food preservation.
Freezer Organization for Maximum Freshness
Freezer storage extends vegetable preservation from months to years when properly vacuum sealed. Maintain a constant temperature of 0°F or below, as fluctuations accelerate quality degradation even in vacuum-sealed packages. Chest freezers typically maintain more consistent temperatures than refrigerator freezers, making them ideal for long-term storage. Organize packages flat in stackable containers or bins categorized by vegetable type or intended use for easy retrieval without extended door-open times.
Create an inventory system to track what’s stored and when it was sealed. This practice prevents forgotten packages and ensures you use older items first. For vegetables intended for long-term storage (over one year), consider using thicker 4-mil bags that provide additional protection against potential freezer burn.
Pantry Storage Options (For Dried Vegetables Only)
Only completely dehydrated vegetables should be considered for pantry storage after vacuum sealing. These must have less than 10% moisture content to prevent botulism risks in oxygen-depleted environments. Store vacuum-sealed dried vegetables in cool, dark locations with temperatures below 70°F for optimal shelf life. Under these conditions, properly dried and vacuum-sealed vegetables can last 1-5 years depending on the specific vegetable type.
Protect pantry-stored packages from light exposure, which degrades both nutrients and flavors even through vacuum-sealed bags. Consider placing vacuum-sealed packages inside opaque containers for additional protection from light and physical damage. Periodically check these packages for any signs of moisture or seal failure.
Common Mistakes That Ruin Vacuum Sealed Vegetables
Even with the best equipment, simple errors can compromise your preservation efforts. Recognizing and avoiding these common pitfalls ensures better results and prevents wasted food. Most vacuum sealing failures stem from these easily correctable mistakes rather than equipment problems.
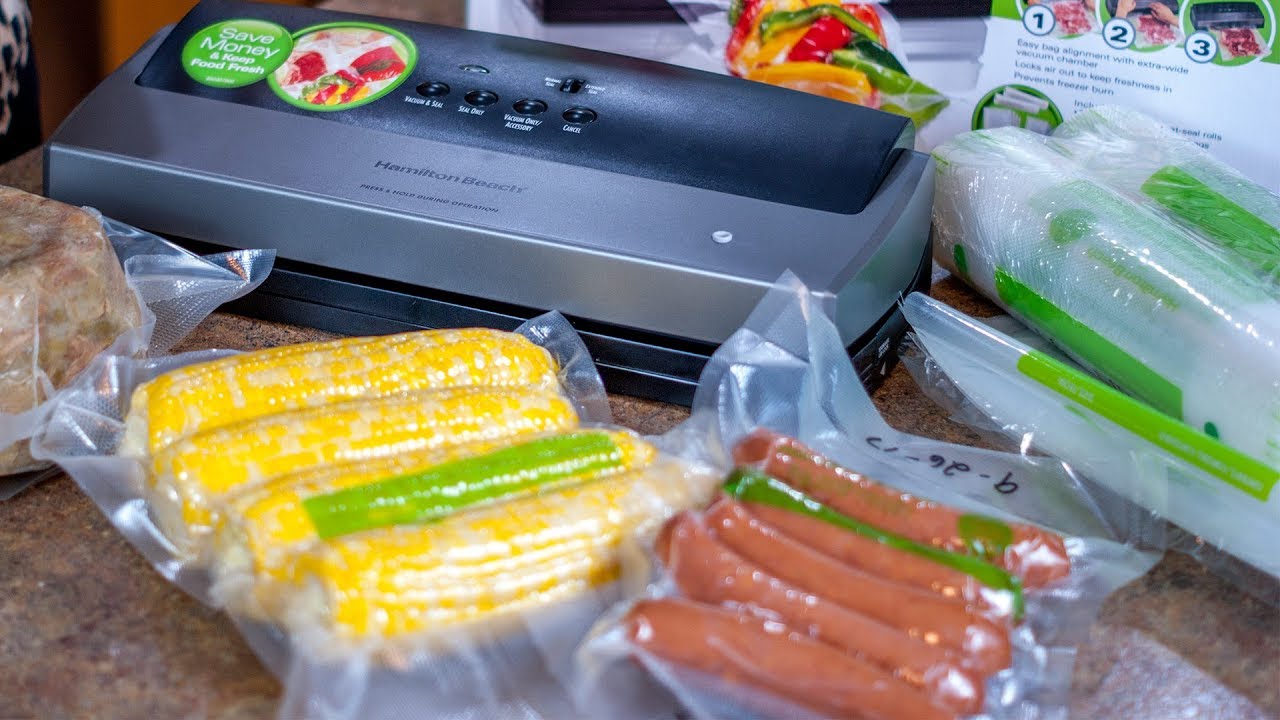
Image from www.youtube.com.
Overfilling Bags
Cramming too many vegetables into each bag is perhaps the most common error new vacuum sealers make. Overfilled bags prevent proper air removal and often lead to incomplete seals or punctures. Always fill bags no more than two-thirds full, leaving ample headspace for the vacuum process to work effectively. This practice also prevents sharp vegetable edges from piercing the plastic during the vacuum process.
Beyond seal integrity, overfilled bags create storage inefficiencies. Thinner, properly filled packages freeze more quickly and thaw more evenly than bulky overfilled ones. They also stack more efficiently in storage spaces and allow you to remove only what you need rather than thawing excessive amounts.
Skipping the Blanching Step
Bypassing the blanching process might seem like a time-saver, but it significantly compromises long-term quality for most vegetables. Unblanched vegetables continue their enzymatic breakdown processes even when vacuum sealed and frozen, resulting in off-flavors, texture degradation, and nutrient loss within weeks or months. The extra 10-15 minutes spent blanching pays dividends in maintaining vegetable quality for months or years rather than weeks.
Improper Cooling Before Sealing
Sealing vegetables while they’re still warm introduces moisture and condensation inside the package, which can lead to freezer burn and quality degradation. Always cool blanched vegetables completely before vacuum sealing—ideally to refrigerator temperature or below. Spread them in a single layer on towel-lined baking sheets for faster cooling and moisture removal.
Rushing this cooling step also risks thermal damage to your vacuum sealer. Most home machines aren’t designed to handle warm foods, and the heat can soften the sealing mechanism or warp the plastic bags, resulting in failed seals. Patient cooling produces better quality results and protects your equipment investment.
If you’re processing large batches of vegetables, consider setting up a staged system where items cool in the refrigerator or freezer while you blanch the next batch. This approach maintains workflow efficiency while ensuring everything is properly cooled before sealing.
- Allow vegetables to cool completely to refrigerator temperature (34-38°F)
- Use ice baths for rapid cooling after blanching
- Pat vegetables dry with clean kitchen towels after cooling
- Arrange in single layers for even cooling and drying
- Consider refrigerating for 30 minutes before vacuum sealing for best results
Using Damaged Bags
Small nicks, creases, or manufacturing defects in vacuum bags can compromise the entire preservation process. Always inspect bags before use, holding them up to light to check for pinhole punctures or thin spots. Discard any damaged bags rather than risking failed seals and wasted food. The few cents saved by using a questionable bag can cost dollars in spoiled vegetables later.
Creative Uses for Your Vacuum Sealed Vegetables
Vacuum sealing vegetables opens up creative possibilities beyond basic preservation. Thinking strategically about how you’ll eventually use these ingredients transforms vacuum sealing from a storage method into a comprehensive meal preparation system. With a little planning, you can create convenience foods that rival commercial options while controlling exactly what goes into them!
Consider vacuum sealing as an extension of your cooking process rather than merely a preservation technique. This mindset shift encourages creative combinations and preparation methods that simplify future meal preparation while maximizing vegetable flavor and nutrition.

Image from www.amazon.com.au.
Ready-to-Cook Vegetable Meal Kits
Create personalized freezer meal starters by combining complementary vegetables in single packages. Fajita mixes with sliced bell peppers and onions, stir-fry blends with broccoli, carrots, and snow peas, or soup starter kits with diced mirepoix are just a few possibilities. These vegetable combinations can be blanched together if they require similar processing times, or blanched separately and combined after cooling.
Take this concept further by adding portion-appropriate seasonings to your vegetable packages. Herb blends, spice mixes, or even small containers of homemade sauces can be included in larger vacuum bags alongside your vegetable packages, creating complete meal starters that only need protein added. These convenience kits reduce weeknight cooking time without sacrificing quality or nutrition.
For even more convenience, consider sous vide-ready packages where vegetables are combined with small amounts of butter, herbs, and seasonings before vacuum sealing. These ready-to-cook packages can go directly from freezer to sous vide bath or pot of boiling water, with perfect seasoning already included!
Ready-to-Cook Meal Kit Ideas
Italian Vegetables: Zucchini, bell peppers, onions with Italian herbs
Stir-Fry Blend: Broccoli, carrots, snow peas, water chestnuts with ginger
Roasting Medley: Cubed root vegetables with rosemary and thyme
Soup Starter: Carrots, celery, onions, leeks with bay leaves
Fajita Mix: Bell peppers, onions with cumin and chili powder
Label these specialty packages clearly with both contents and suggested cooking methods to make meal preparation truly effortless. Consider including a basic recipe right on the label for grab-and-cook convenience.
Preserving Garden Harvests
Garden harvests often produce more than can be consumed fresh, making vacuum sealing an ideal solution for preserving homegrown bounty. Process vegetables in batches as they ripen, maintaining peak freshness rather than waiting until they begin to deteriorate. For gardens with succession planting, this approach allows you to preserve each harvest at its prime quality.
When preserving multiple varieties of the same vegetable—such as different types of peppers or tomatoes—keep them separated by variety in your vacuum sealed packages. This separation preserves the unique characteristics of each variety and allows for more precise cooking applications later. Detailed labeling becomes especially important with homegrown produce, where tracking specific varieties can help inform future planting decisions based on preservation success.
Emergency Food Prep
Vacuum sealed vegetables form an excellent foundation for emergency food supplies. Their extended storage life, compact form, and nutritional density make them ideal components of emergency preparedness plans. Create a rotating stock of vacuum sealed vegetables with clear expiration dates, using and replacing items before quality diminishes. For emergency preparation, focus on nutrient-dense vegetables with versatile culinary applications such as carrots, potatoes, sweet potatoes, and frozen leafy greens.
Vacuum Seal Your Way to Less Food Waste
Implementing vacuum sealing as part of your regular kitchen routine dramatically reduces food waste while improving your diet and budget. Start with small batches of vegetables you use most frequently, then expand your preservation repertoire as you gain confidence with the technique. The initial investment in equipment and time quickly pays for itself through reduced food waste, fewer shopping trips, and the ability to purchase vegetables at peak season when prices are lowest. Perhaps most importantly, having properly preserved vegetables readily available encourages healthier eating habits by making nutritious ingredients as convenient as processed alternatives!
Frequently Asked Questions
As you explore vacuum sealing vegetables, questions may arise about specific techniques, storage durations, and best practices. These common questions address the most frequent concerns and help troubleshoot potential issues before they affect your preserved vegetables.
How long do vacuum sealed vegetables last in the freezer?
Properly blanched, dried, and vacuum sealed vegetables typically maintain high quality in the freezer for 1-3 years, compared to 6-8 months for conventional freezer storage. Root vegetables and corn tend to last longest (2-3 years), while high-moisture vegetables like zucchini and bell peppers may show quality decline after 12-18 months. Storage temperature consistency significantly impacts longevity—maintaining a steady 0°F or below temperature maximizes shelf life, while temperature fluctuations accelerate quality loss even in vacuum sealed packages.
Can I vacuum seal all types of vegetables?
While virtually all vegetables can be vacuum sealed with proper preparation, some require special handling. Cruciferous vegetables (broccoli, cauliflower, brussels sprouts) must be blanched before sealing to prevent gas release that could break seals. High-moisture vegetables and fruits benefit from pre-freezing before vacuum sealing to prevent crushing and excess moisture during the vacuum process.
Certain vegetables with very high water content and delicate structures, like cucumber and lettuce, are generally not ideal candidates for long-term vacuum sealed storage unless they’re specifically prepared (such as cucumber pickles or dehydrated lettuce). These items are better suited for short-term refrigerated vacuum storage if needed.
Do I need to blanch vegetables before vacuum sealing?
Blanching is essential for most vegetables intended for long-term freezer storage. This brief heat treatment deactivates enzymes that would otherwise cause flavor, texture, color, and nutrient degradation even in vacuum sealed and frozen vegetables. The only exceptions are onions, peppers, and herbs, which can sometimes be frozen without blanching while maintaining acceptable quality. For short-term refrigerator storage (1-2 weeks), raw vegetables can be vacuum sealed without blanching while still achieving significant shelf-life extension compared to conventional storage methods.
What’s the difference between vacuum sealing and regular freezer bags?
Regular freezer bags primarily provide a physical barrier against freezer air but still contain significant oxygen that continues to affect food quality. Even when attempting to press out air manually, conventional freezer bags typically retain 10-15% oxygen. Vacuum sealing removes 99.9% of air, creating an oxygen-free environment that dramatically slows oxidation processes that cause flavor deterioration and freezer burn.
Beyond air removal, vacuum sealer bags are typically thicker (3-4 mil vs 1-2 mil for standard freezer bags) and constructed with superior barrier properties that prevent oxygen migration through the plastic over time. The heat-seal created by vacuum sealers is also stronger and more reliable than zip-top closures, particularly during long-term storage or when bags are repeatedly moved within freezer spaces.
Can vacuum sealed vegetables be stored at room temperature?
Only fully dehydrated vegetables with moisture content below 10% should be stored at room temperature after vacuum sealing. Fresh or blanched vegetables must be refrigerated or frozen after vacuum sealing, as the anaerobic (oxygen-free) environment can actually accelerate certain types of bacterial growth at room temperature, including potentially dangerous Clostridium botulinum. Vacuum sealing is not a substitute for proper refrigeration or freezing of fresh vegetables.
For dehydrated vegetables, vacuum sealing before room-temperature storage extends shelf life from months to years by preventing moisture reabsorption and oxidation. Store these items in cool, dark locations for maximum quality retention. If you’re unsure whether vegetables are sufficiently dehydrated for room temperature storage, default to refrigeration or freezing instead.
Featured Image from westonbrands.com.

Related Posts
-
 Sweet Potato Harvesting Time!
- 3 Simple Ways to Preserve Your Leftover Tomatoes
- Sweet & Savory Mediterranean Baked Sweet Potatoes Recipe
- Food Preservation 101: The Ultimate Guide to Preserving Food at Home
- How to Grow Edible Amaranth At Home
- 5 Mistakes Beginners Make When Preserving Food (& How to Avoid Them)


